- Updated : 14/Jan/2026
- Support Email : support@pixelnx.com
Introduction
PixelPlay
Editing videos have always been a task with a great time investing strategy. Our team brings a PixelPlay WordPress plugin that makes editing your video effortless. It helps you to add overlay and animation effects on the videos of your WordPress website and enhance the appearance
Every feature of the Plugin PixelPlay WordPress plugin is editable and customizable. Edit a youtube vlog video or a video to post on Vimeo or any other platform.
The PixelPlay WordPress plugin has the facilities where you can edit the thumbnail, add text, add emojis, and change the background. There are 20 templates already added which are ready to use. Voice over option lets you add a voice or audio to your video. Also, the animation feature makes your video more interesting.
When you plan to post on your social media, but then the video takes a long, here’s how you can post consistently and grab a good audience or maybe be famous.
Introducing our latest feature: the ability to search images seamlessly from popular platforms such as Pixabay, Pexels, Unsplash, and even OpenAI API! With just a few simple steps, you can unlock a world of possibilities for your WordPress site. By integrating your API key, our platform grants you unparalleled flexibility in searching and adding millions of captivating images from these renowned marketplaces. Gone are the days of tedious manual uploads – now you can enhance your website effortlessly, all with just a few clicks.
Engage, enthrall, and entice your viewers with Pixel Play - Video Autoplay And Thumbnail Overlay WordPress Plugin.
Plugin Created Date:
Plugin Updated Date:
Please check Live Preview:
Creative Author Portfolio:
Features
There are more than enough features squeezed in this plugin like
Features of the plugin
- Drag and Drop Editor
- Supports Youtube, Vimeo and Custom Video
- Download images from Pixabay, Unsplash, Pexels and OpenAi API
- Direct download images into media library
- 20 Pre Built Demo Templates
- User can change overlay
- Draggable and Resizable Emoji Option
- Draggable and Resizable Play Button
- Voice over option
- Supports Template Import
- Overlay Background
- Animation Option
- Ready To Use Shortcode for generated template

Installation
Pixel Play Plugin installation doesn’t differ from any other plugin installation process, so you might be familiar with this process already. If not, please follow instructions below. The zip you have received from code canyon, please unzip it and then you will see 2 files.
- pixelplay.zip
- Documentation Help
Plugin Installation
Steps of Installation
Step 1 Login to your website (WordPress admin) .
Step 2 Navigate to Plugins >> Click on Add New.
Step 3 Click on Upload Plugin button.
Step 4 Browse to the pixelplay zip file and choose that file.

Step 5 Click “Install Now” button and wait while plugin is uploaded on your server.
Step 6 Now, Activate the plugin by clicking on "Activate Plugin" button.
Step 7: Once it will get Activated you will see PixelPlay icon on WordPress dashboard.

Note Please make sure that the max-upload size in the WordPress must be greater than 30MB.
Plugin Options
After activating the plugin you will get three settings PixelPlay, Templates, and API Settings.
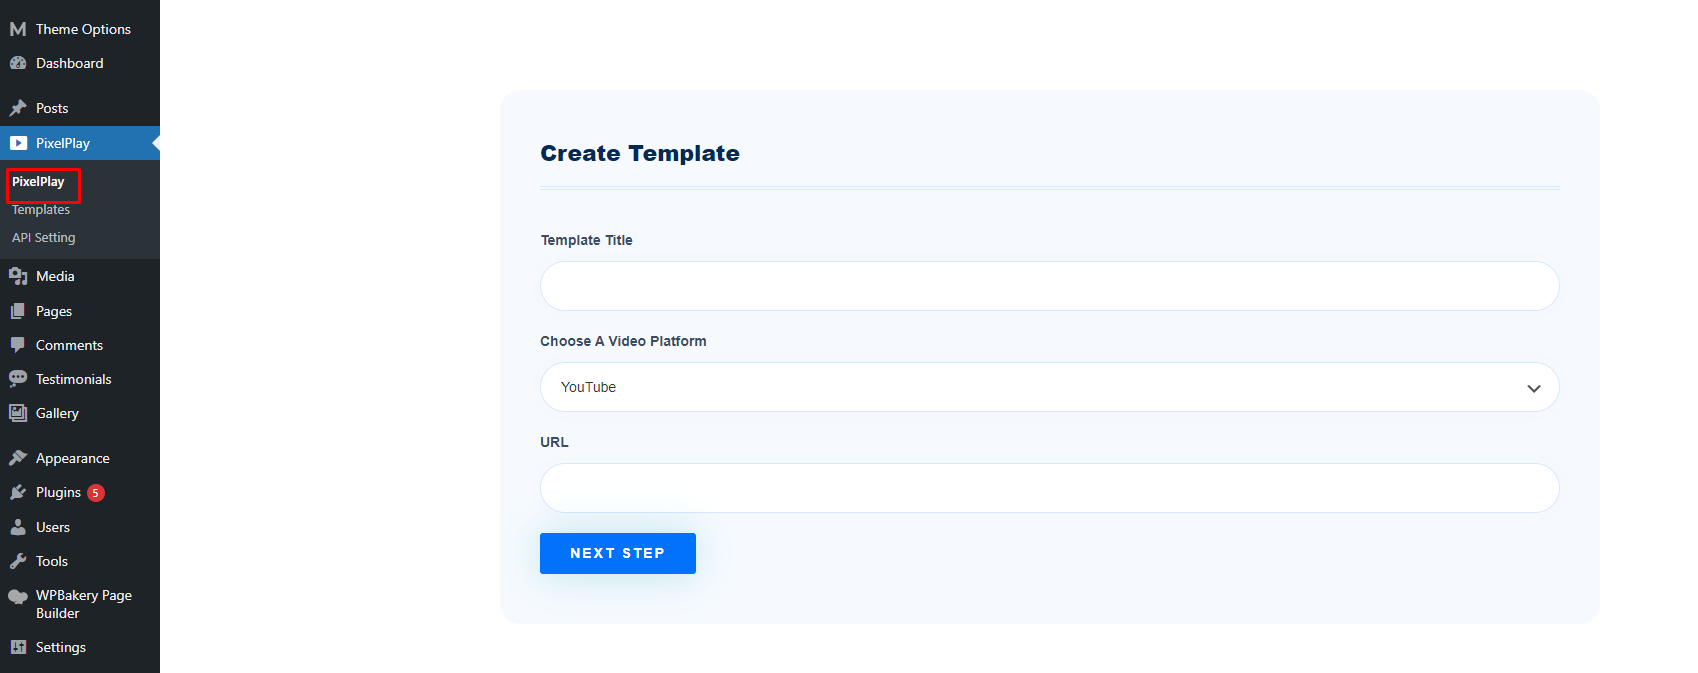
PixelPlay
With this option, you will get settings to create template.
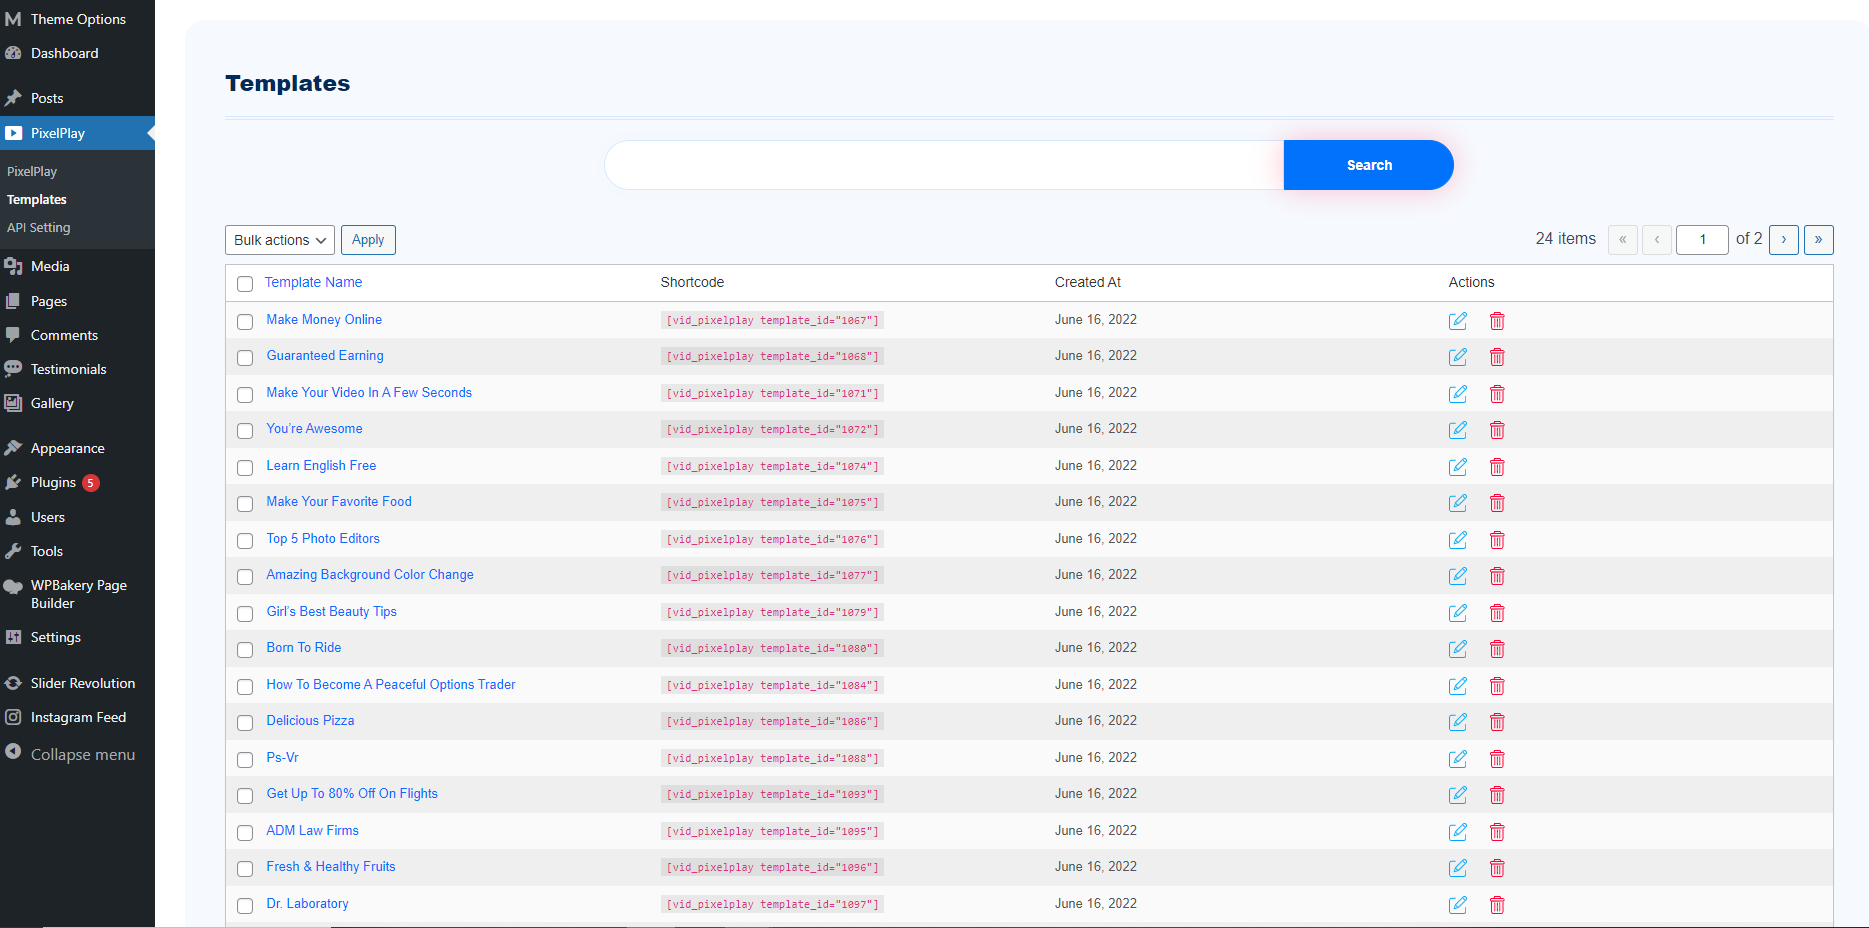
Templates
It shows the lists of the templates. You can edit, delete, or search the templates, and you can copy the shortcode of the template and paste it on the desired webpage.
API Setting
You can connect the API key of Pixabay, Unsplash, Pexels, and OpenAI through this setting.

How to Use
How To Create Template
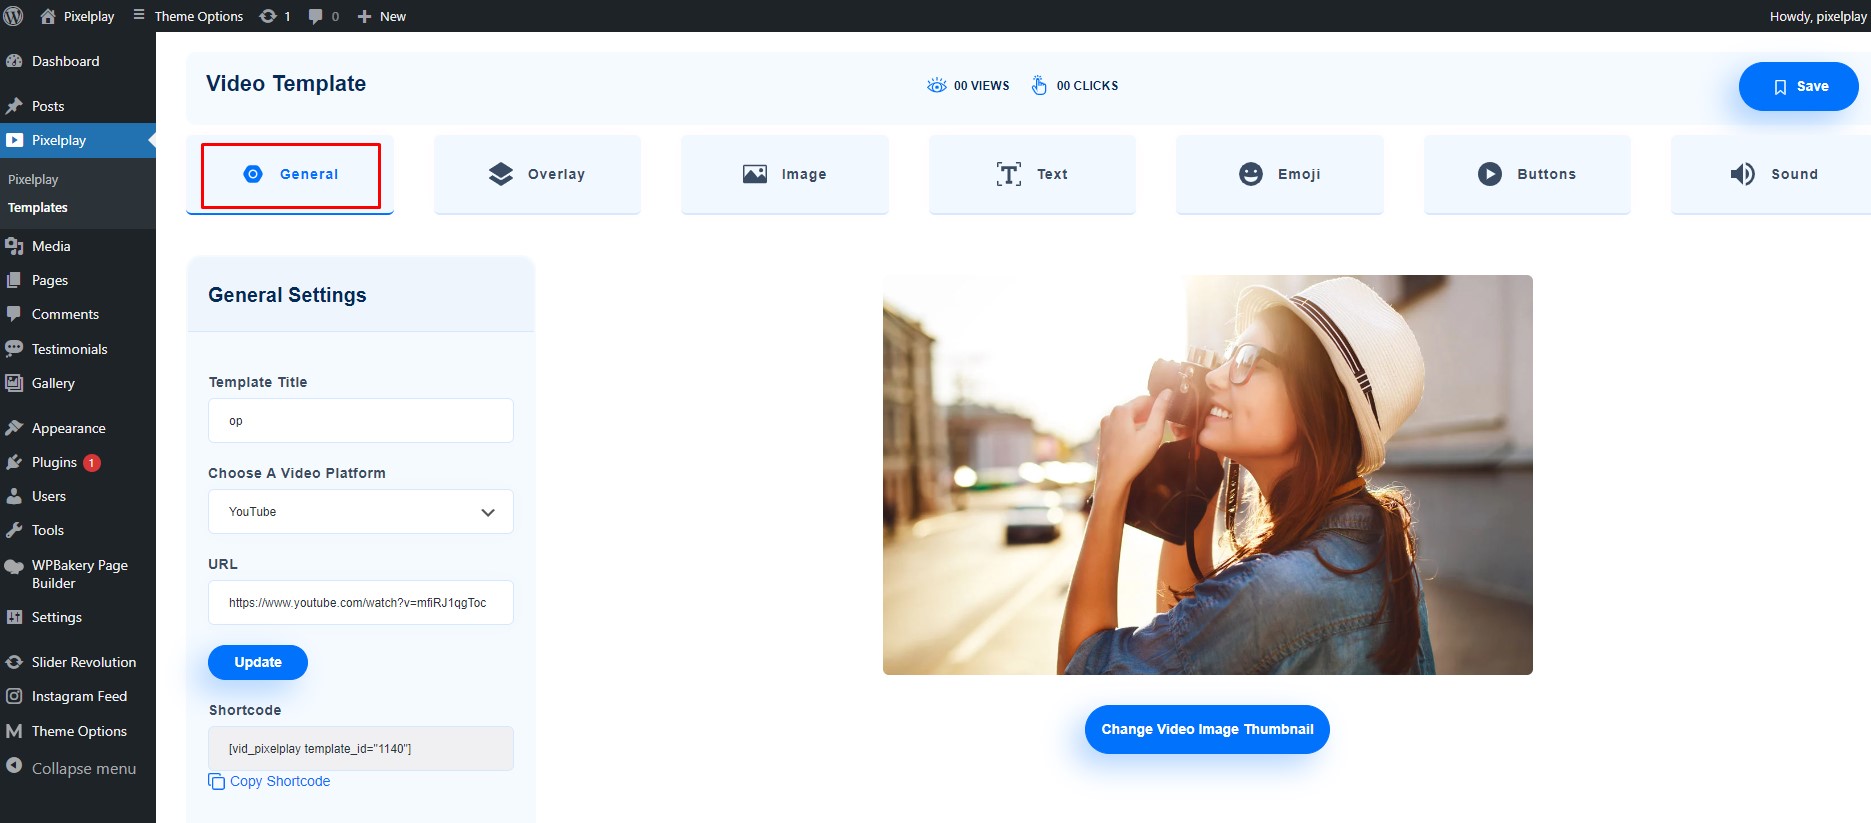
Step 1 – Click on Pixelplay option, enter Template Title , Choose a Video Platform and Video URL. You can choose YouTube Video, Vimeo Video or Upload Custom Video. Once you select any of video platform you will get settings accordingly. Then Click on Next Step Button.

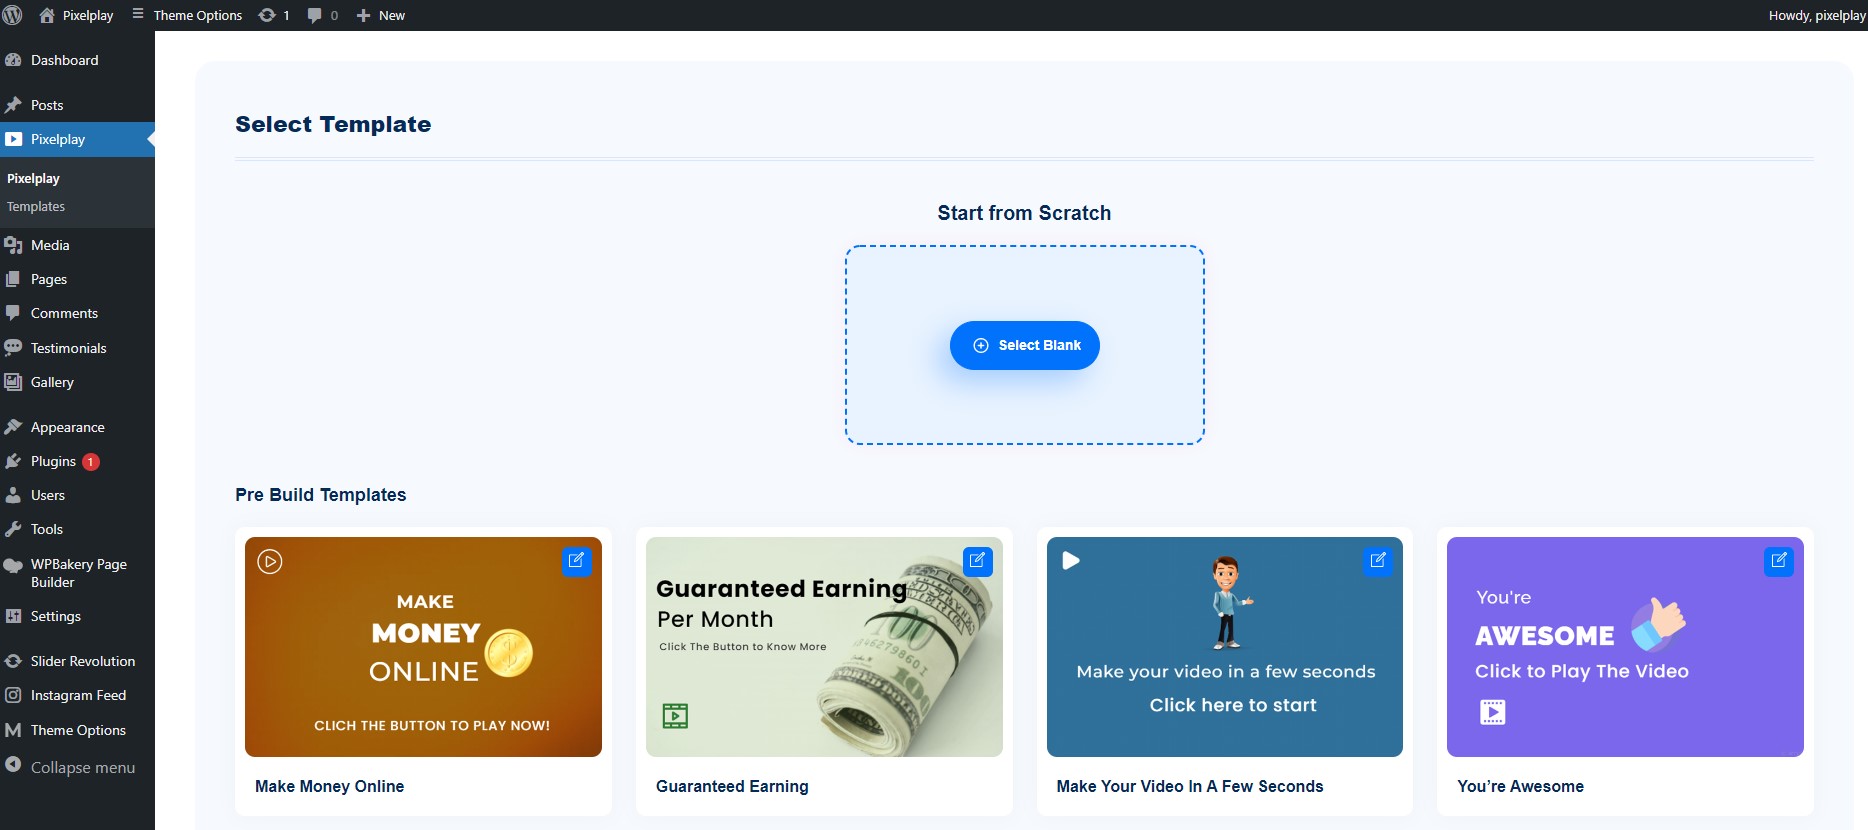
Step 2 – After clicking Next Step you will be redirected to Templates page. You can either select any of pre-built template or can create from scratch.
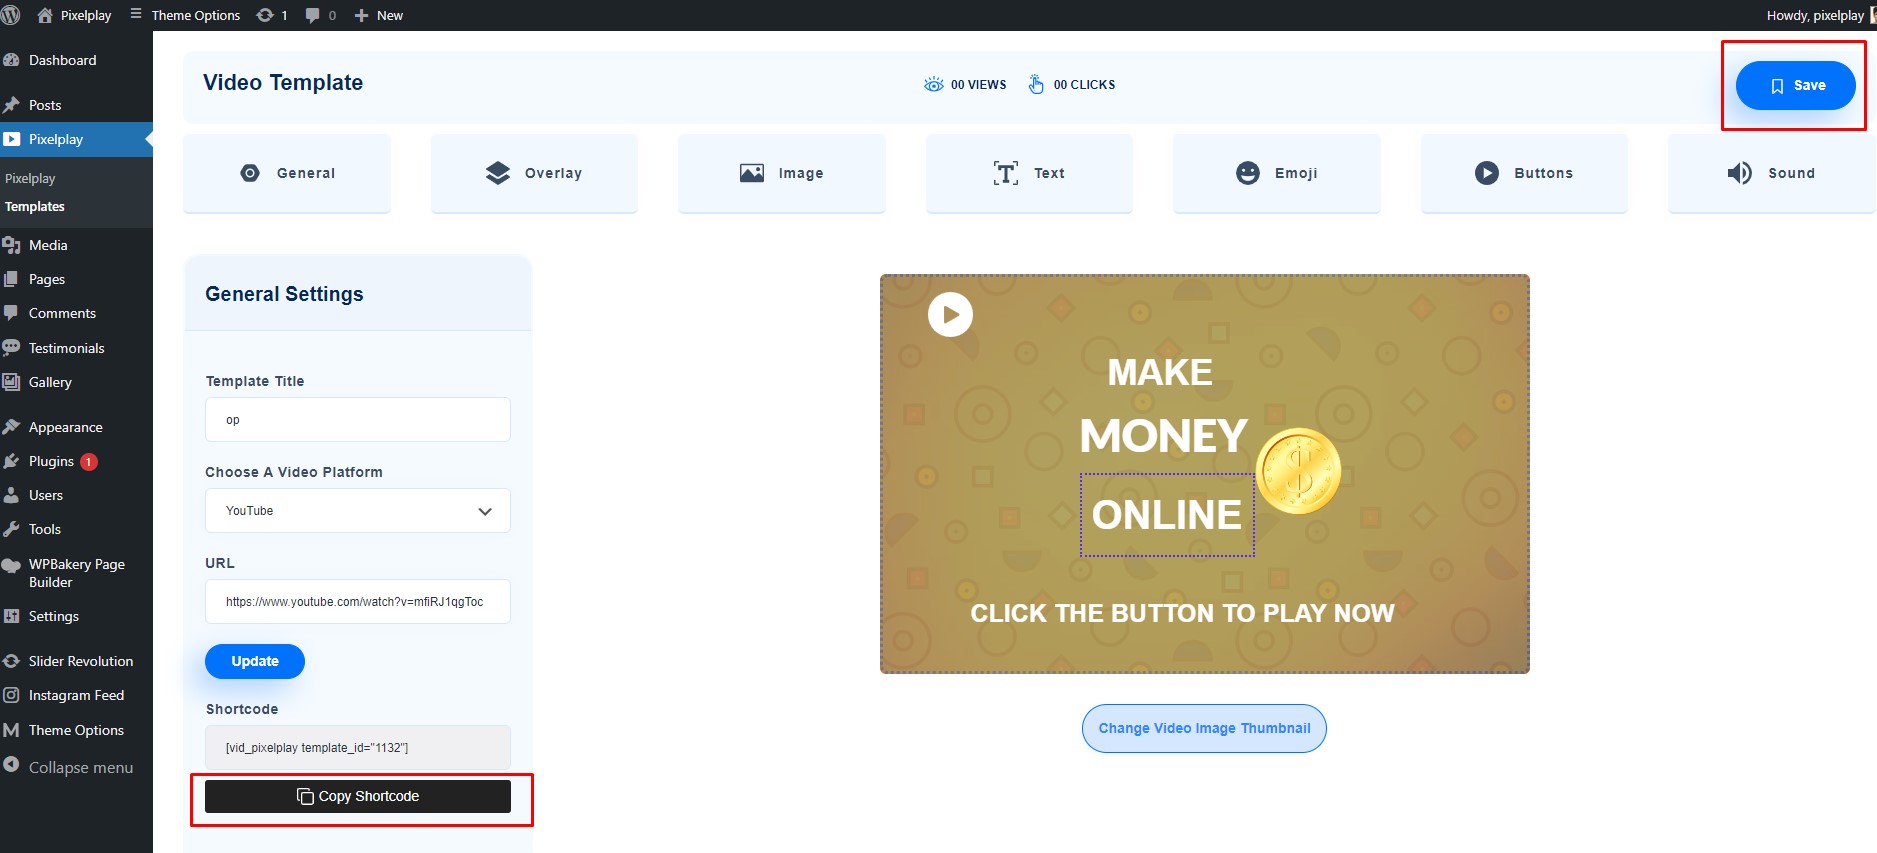
Step 3 – After creating a template click on Save button and copy shortcode.
Step 4 – Navigate to Pages >> Add New, select Textblock and paste the shortcode. After that publish the page.

How To Add Pixabay, Pexels, Unsplash, and OpenAI Images
After connecting the API key of Pixabay, Pexels, Unsplash, and OpenAI Images you can search images in Media Library.
1. Navigate to WordPress dashboard >> Post or page. Create New Page/Post and select Set Featured Image option.

2. You will get PixelPlay option. Enter the keyword in the search bar and select the any desired option from Pixabay, Unsplash, Pexels, and OpenAI. Hover on the image needed, and click on Use button.

3. The selected image will be saved in the Media Library and you can Set it as a Featured Image.

Editor Options
When you select Start From Scratch option, you will get an Editor screen like this. You will get multiple settings to make the video more attractive.

General Settings
In General Settings you can customize the Template Name, Video Platform and URL.
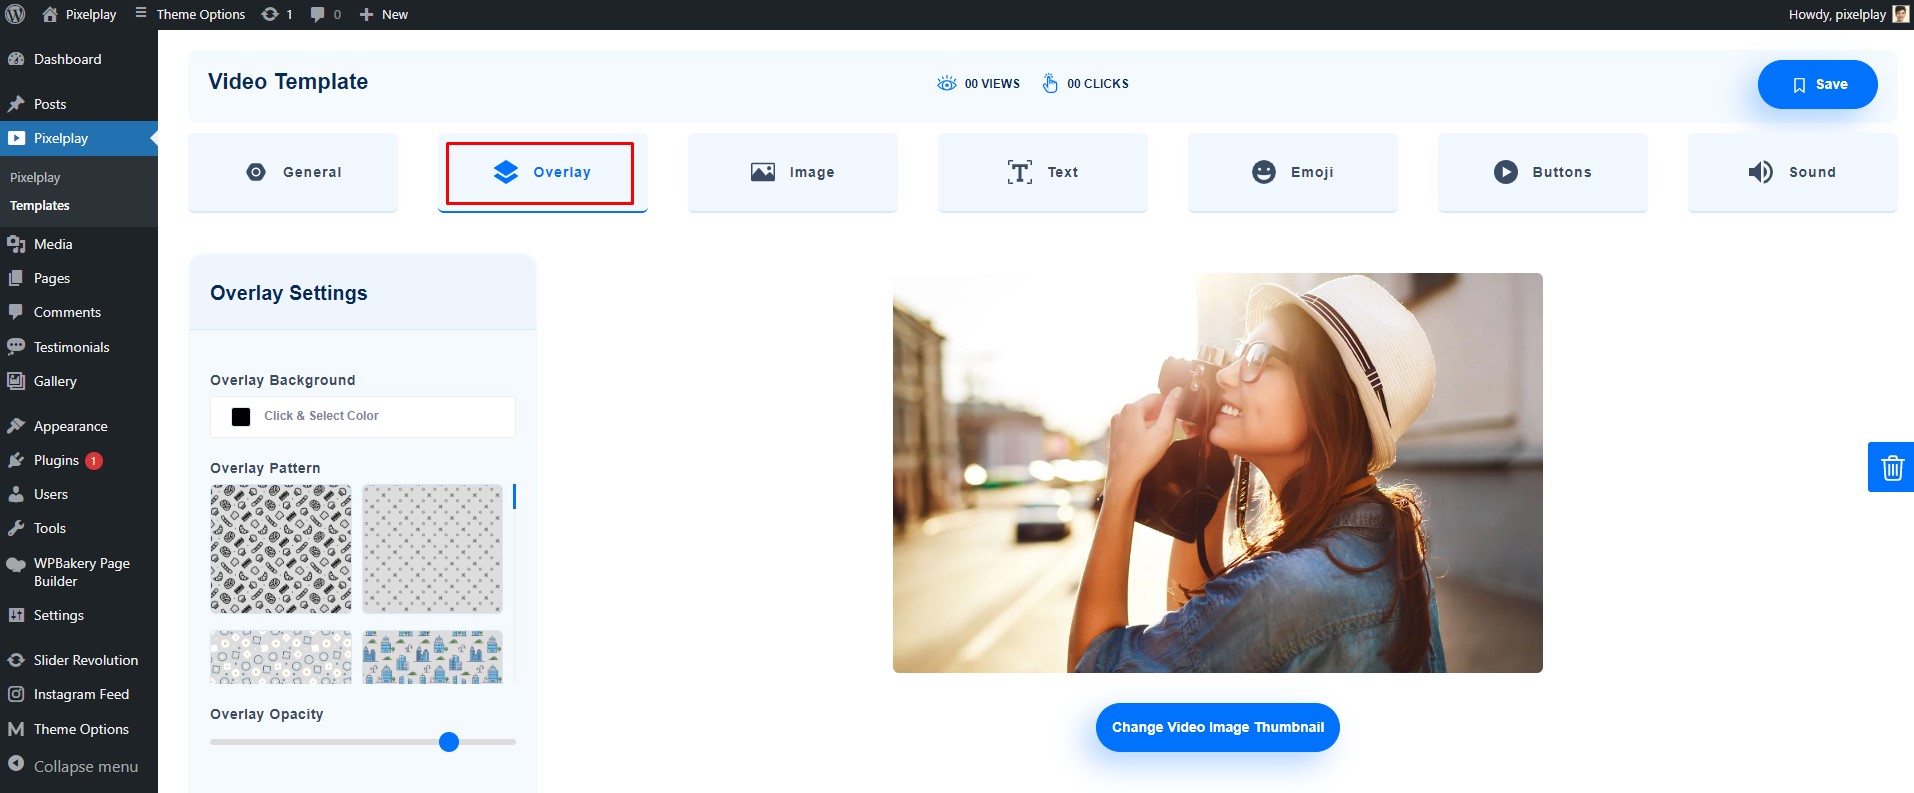
Overlay
Overlay settings enables you to customize overlay background color, overlay pattern and overlay opacity.
Image
With image settings you can select image and apply various Animation effects in it as required.

Text
Text settings allows you to add the Text on your video template. You can change font family, alignment, opacity, font size, font style and can add animation you want.

Emoji
This setting enables you to add emojis with Animation effects.

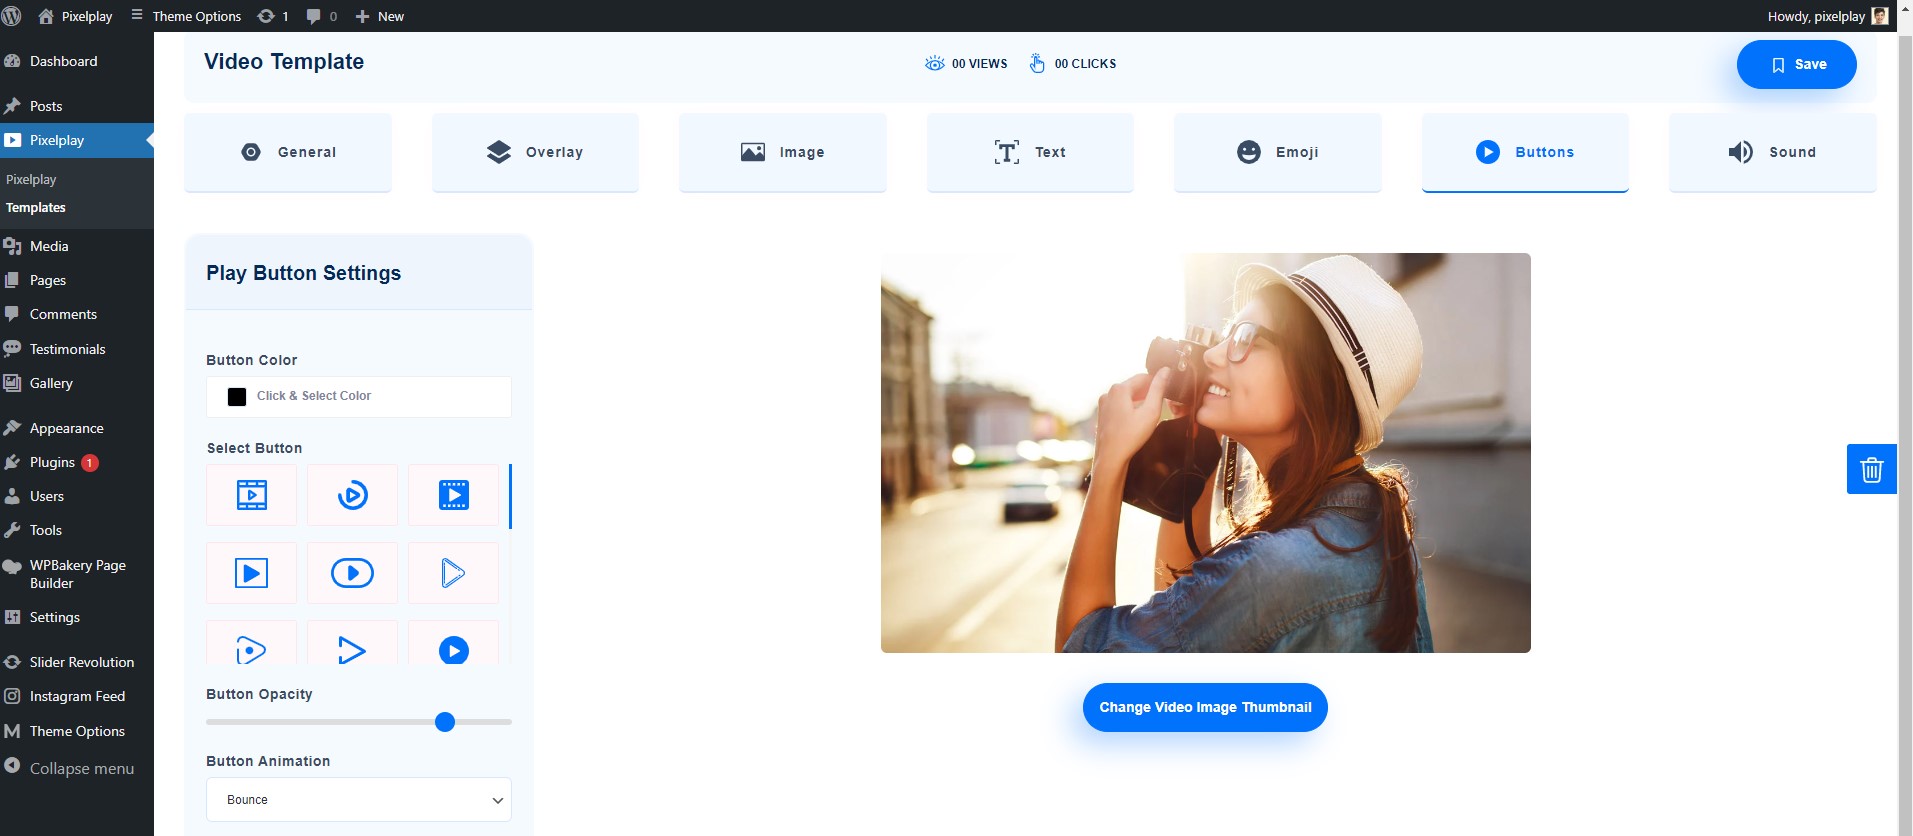
Button
You can add button on your video template and customize its opacity, color and animation effects.
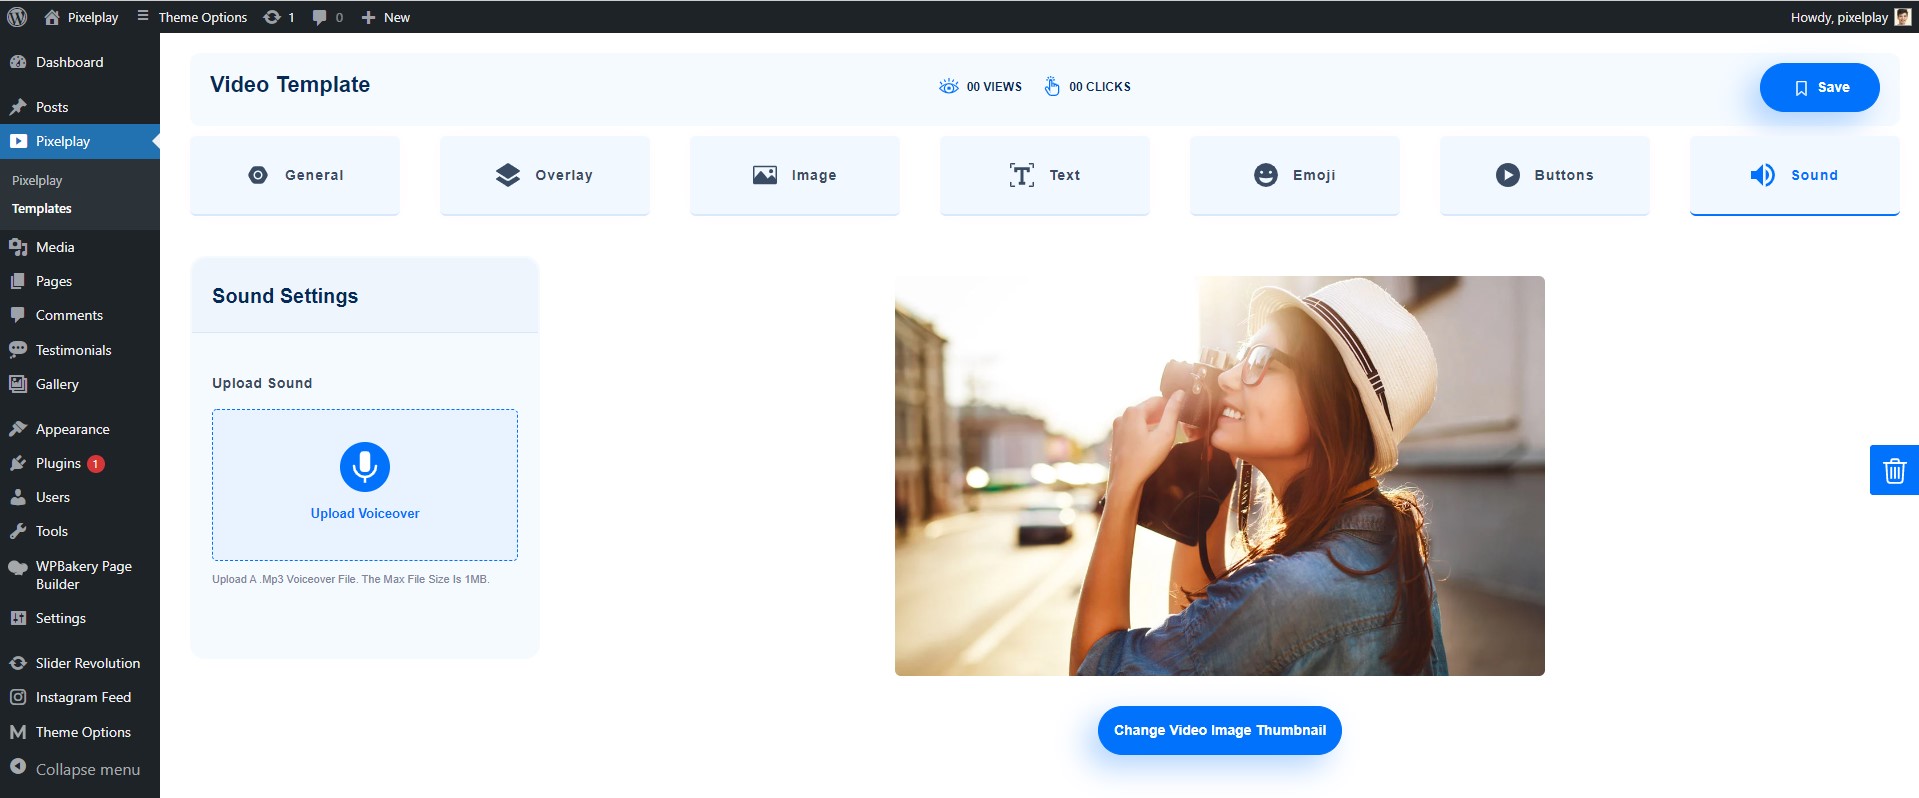
Sound
Sound settings allows you to add voice in the template.
Help And Support
In order to receive a technical support assistance, you need to have a valid purchase code. To get the code, please navigate to your Codecanyon "Downloads" page and click on the plugin download link.
After getting the Purchase code, please follow the steps mentioned on the link Click Here to get your product verified. And then share your Purchase code and token ID with the support team.
If you have any questions that are beyond the reach of this help file, feel free to contact us. We will respond as soon as possible (within 24 – 48 hours, usually faster). We are open from 10:00am to 07:00pm (IST), from Monday till Friday.
NOTE: As authors of this plugin we do provide support only for the plugin-related features.
Outro
Thank you for your purchase. If you have any questions that are beyond the scope of this help file, please contact us through support@pixelnx.com
Once again, thank you so much for purchasing this plugin. As I said at the beginning, I'd be glad to help you if you have any questions relating to this plugin. No guarantees, but I'll do my best to assist. If you have a more general question relating to the plugin, you might consider visiting the forums and asking your question in the "Item Discussion" section.