- Created : 02/11/2021
- Support Email: support@pixelnx.com
- Updated : 16/Jan/2026
Introduction
Handily Booking WordPress Plugin
This Handily plugin adds a fantastic booking system to your website. Manage your hotel rooms, café tables, services, and client base all in one location to save time and money. Handily is intended to increase your online sales and establish effortless appointments. This is a one-stop-shop for any company. The Handily Plugin will assist you in selling overnight reservations, tour reservations, hotel reservations, appointments, and rentals.
The most striking feature is that it support QR code and the appointment booking form is fully responsive on any device. Handily can be installed without any coding knowledge.
Plugin Update Date:
Please check Live Preview:
Creative Author Portfolio:
Features
There are more than enough features squeezed in this plugin like
Features of the plugin
- Fast online booking system
- Friendly appointment interface
- 100% responsive
- Easy to use and navigate
- Minimal data input required
- User friendly
- With Shortcode
- Support QR code
- Traffic Monster
- Social Share Option
- Fully Documented and 24*7 support

Installation
Handily Booking Plugin installation doesn’t differ from any other plugin installation process, so you might be familiar with this process already. If not, please follow instructions below. The zip you have received from code canyon, please unzip it and then you will see 3 folders.
- Documentation
- Licensing
- Upload
Plugin Installation
Steps of Installation
Step 1 Login to your website (WordPress admin) .
Step 2 Navigate to Plugins >> Click on Add New.
Step 3 Click on Upload Plugin button.
Step 4 Browse to the handily.zip file (Navigate to Upload >> Plugin) and choose that file.

Step 5 Click “Install Now” button and wait while plugin is uploaded on your server.
Step 6 Now, Activate the plugin by clicking on "Activate Plugin" button.
Step 7: Once it will get Activated you will see Handily icon on WordPress dashboard.
How to Use the Handily Booking Plugin
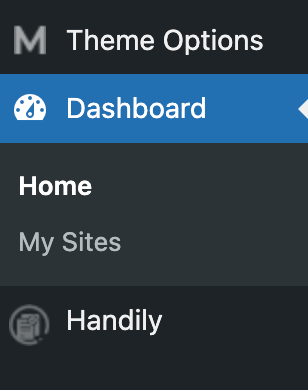
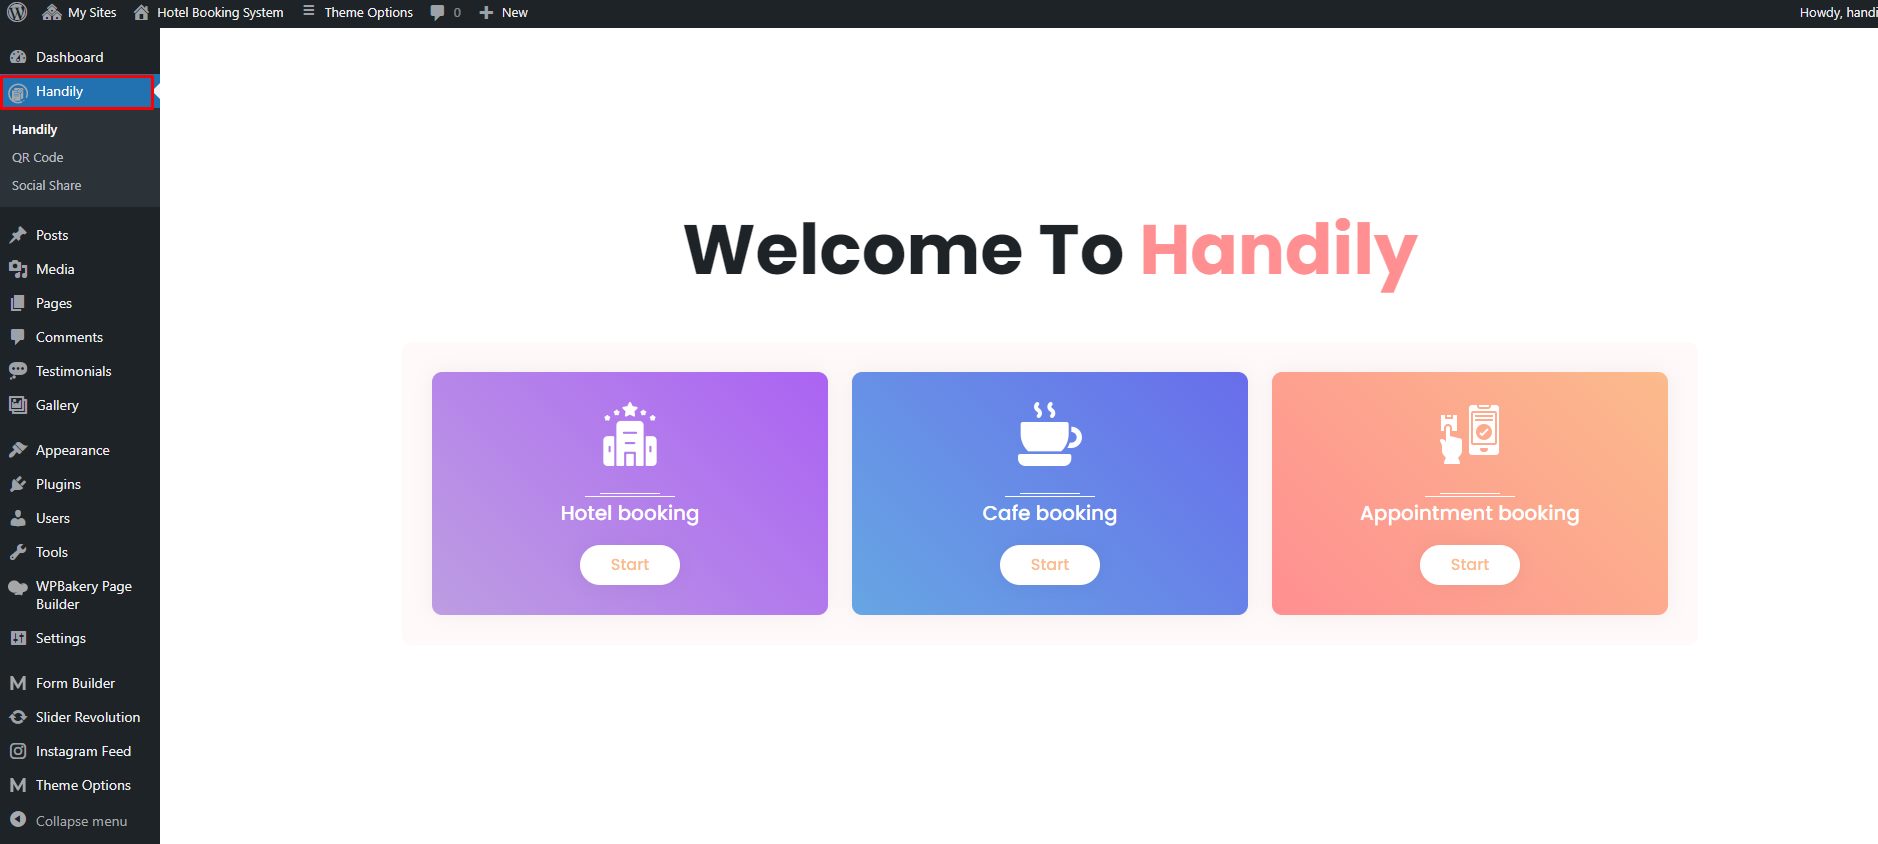
1. After installing the plugin you will see Handily icon on the Dashboard.
2. Select any service from the Appointment Booking, Hotel Booking and Cafe Table Booking. After selecting a service will get options accordingly.
How to Use Appointment Booking
After selecting the Appointment Service you will get the QR code, Social Share and Appointment settings.
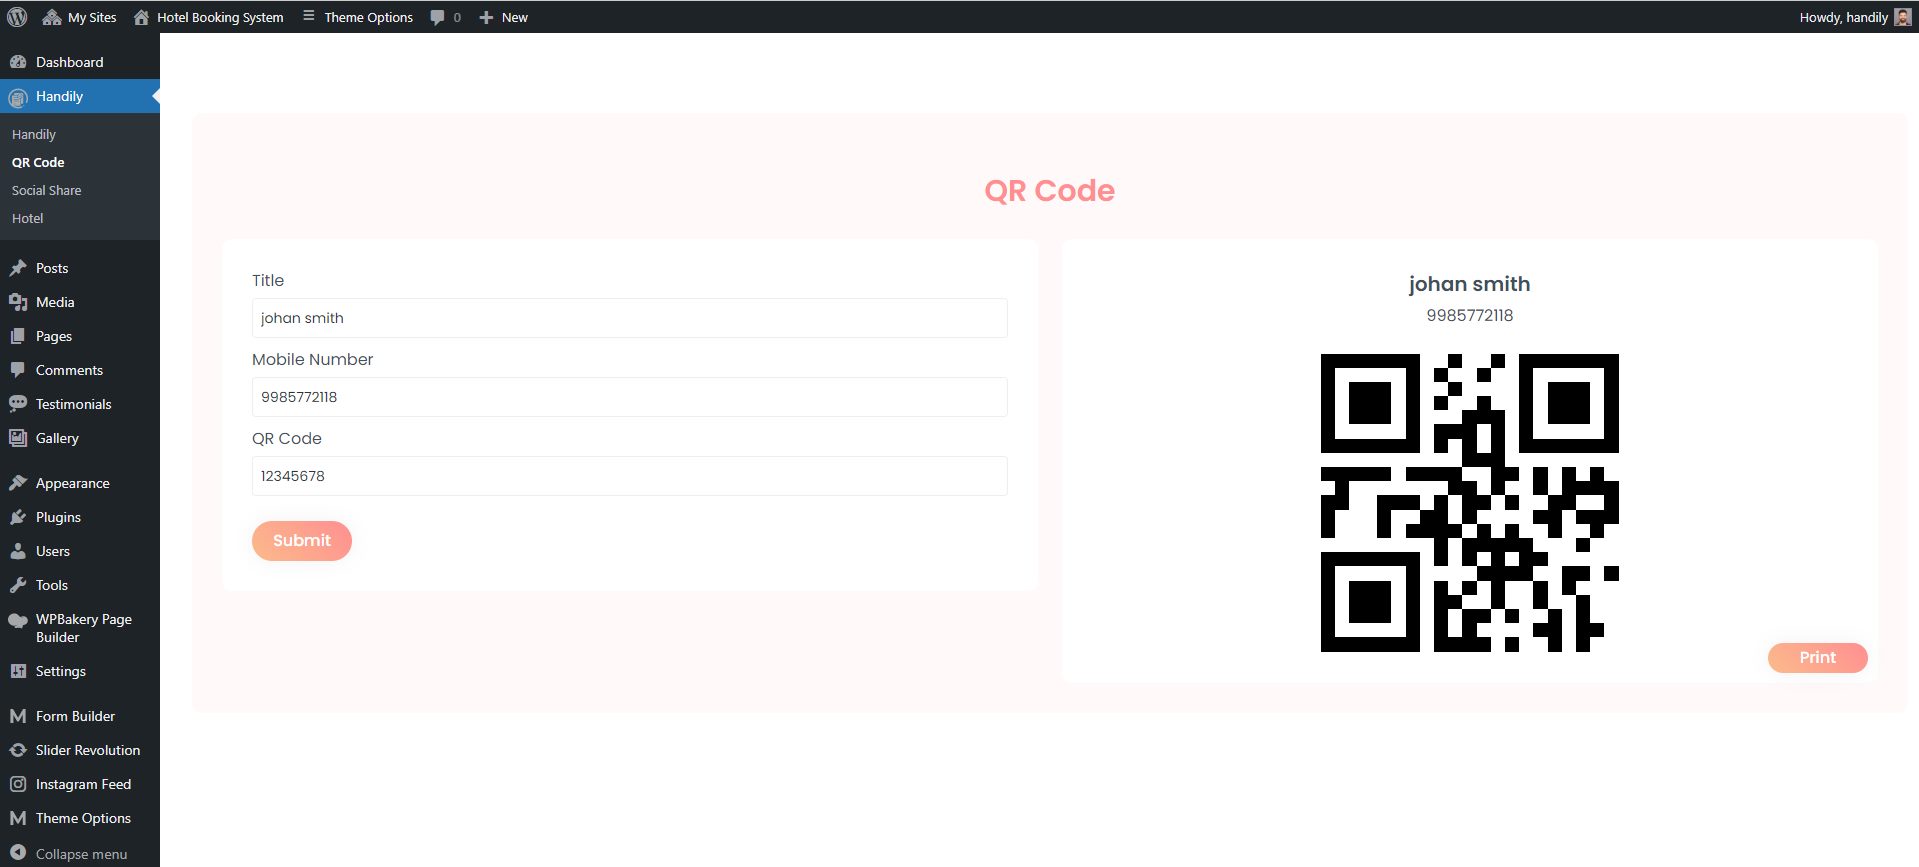
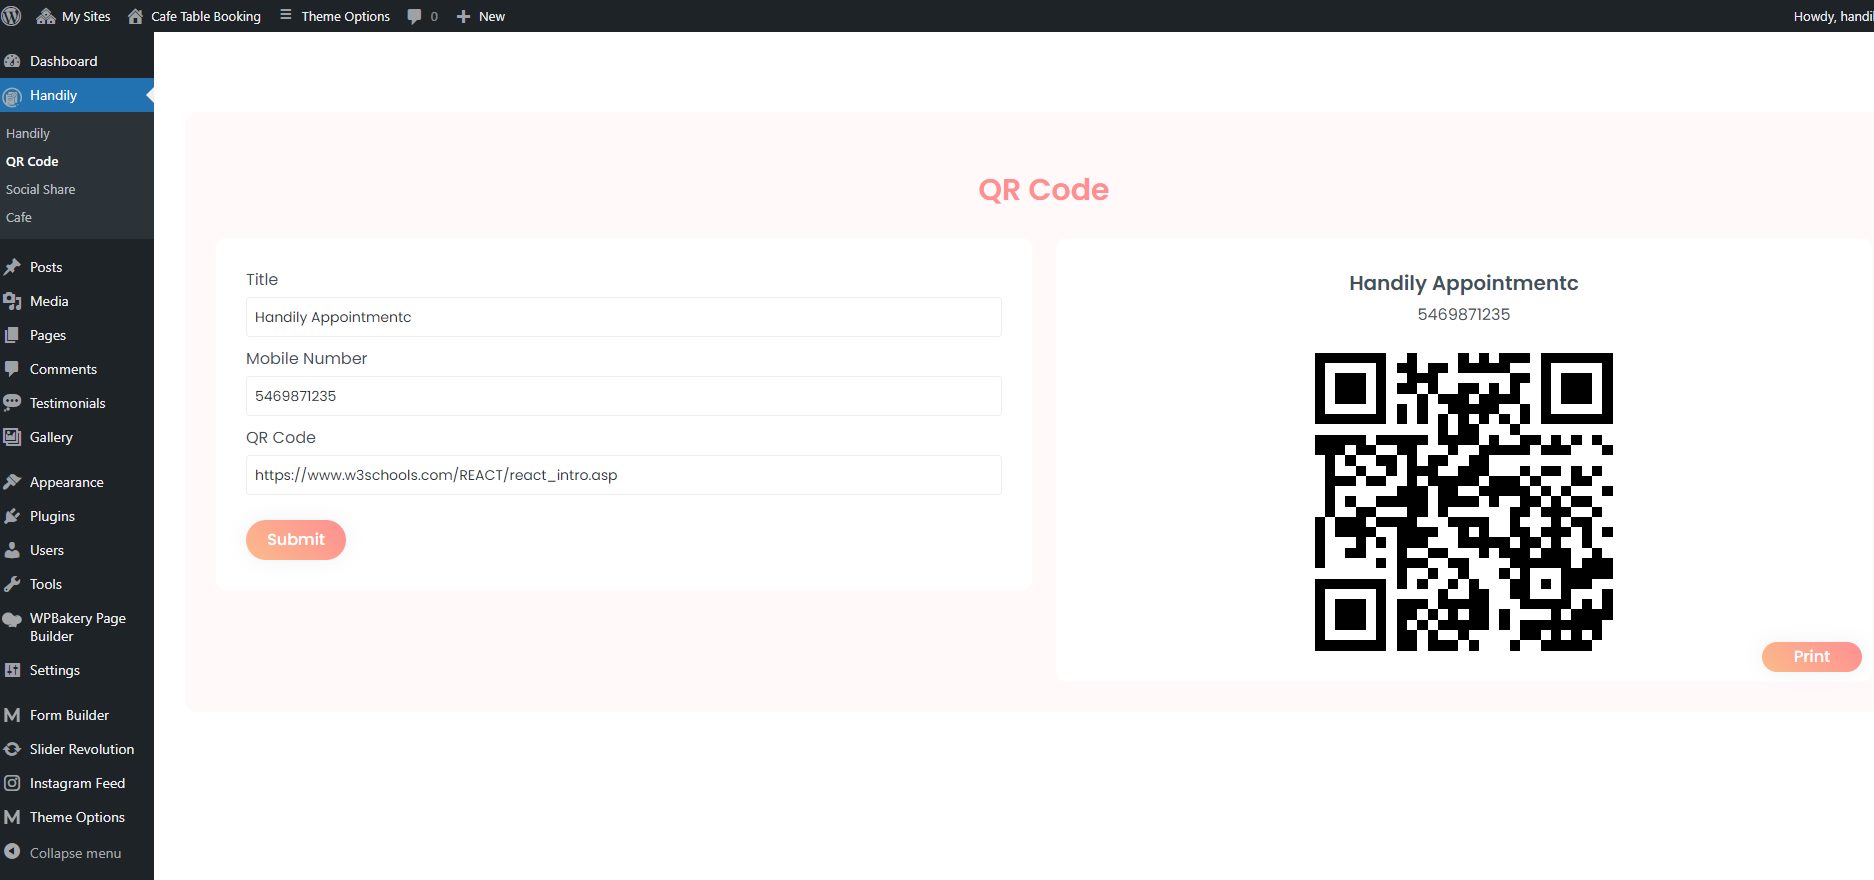
How to add QR Code
Navigate to Dashboard >> Handily >> QR Code. With this you can add the QR code. With this you can add the QR code.

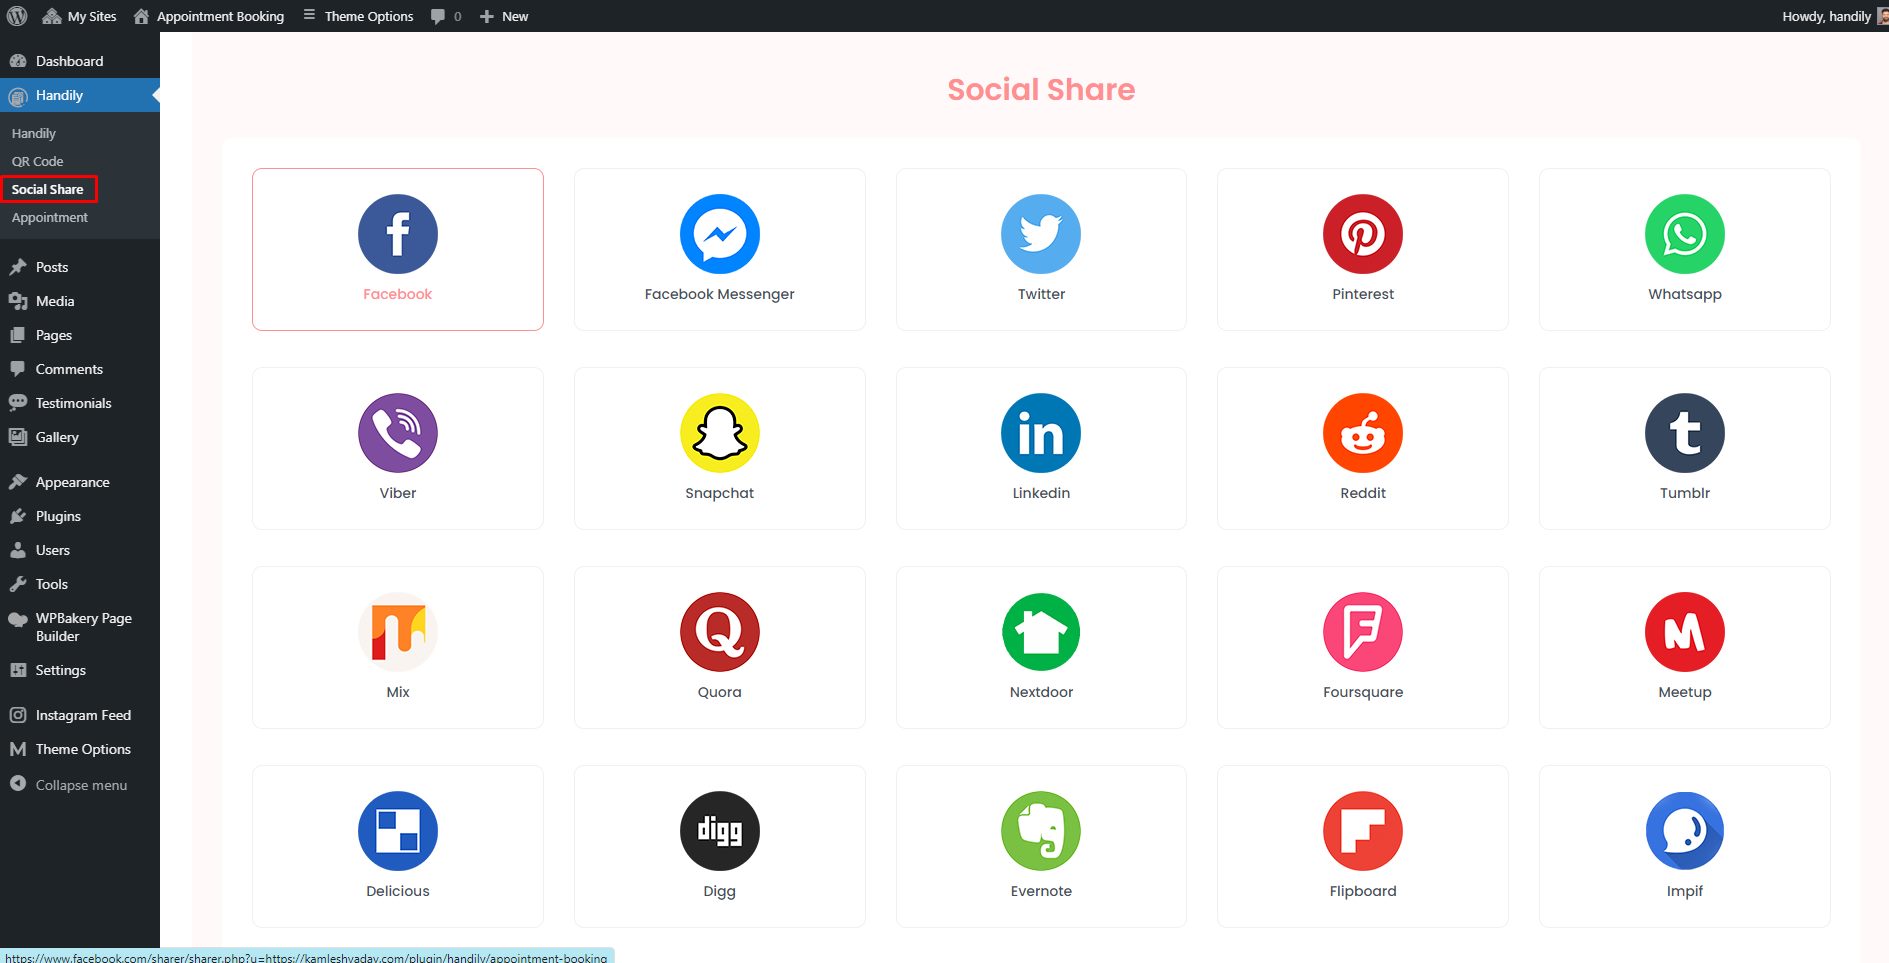
How to use Social Share
Navigate to Dashboard >> Handily >> Social Share. With this setting, user can share it via social network by selecting the platform.
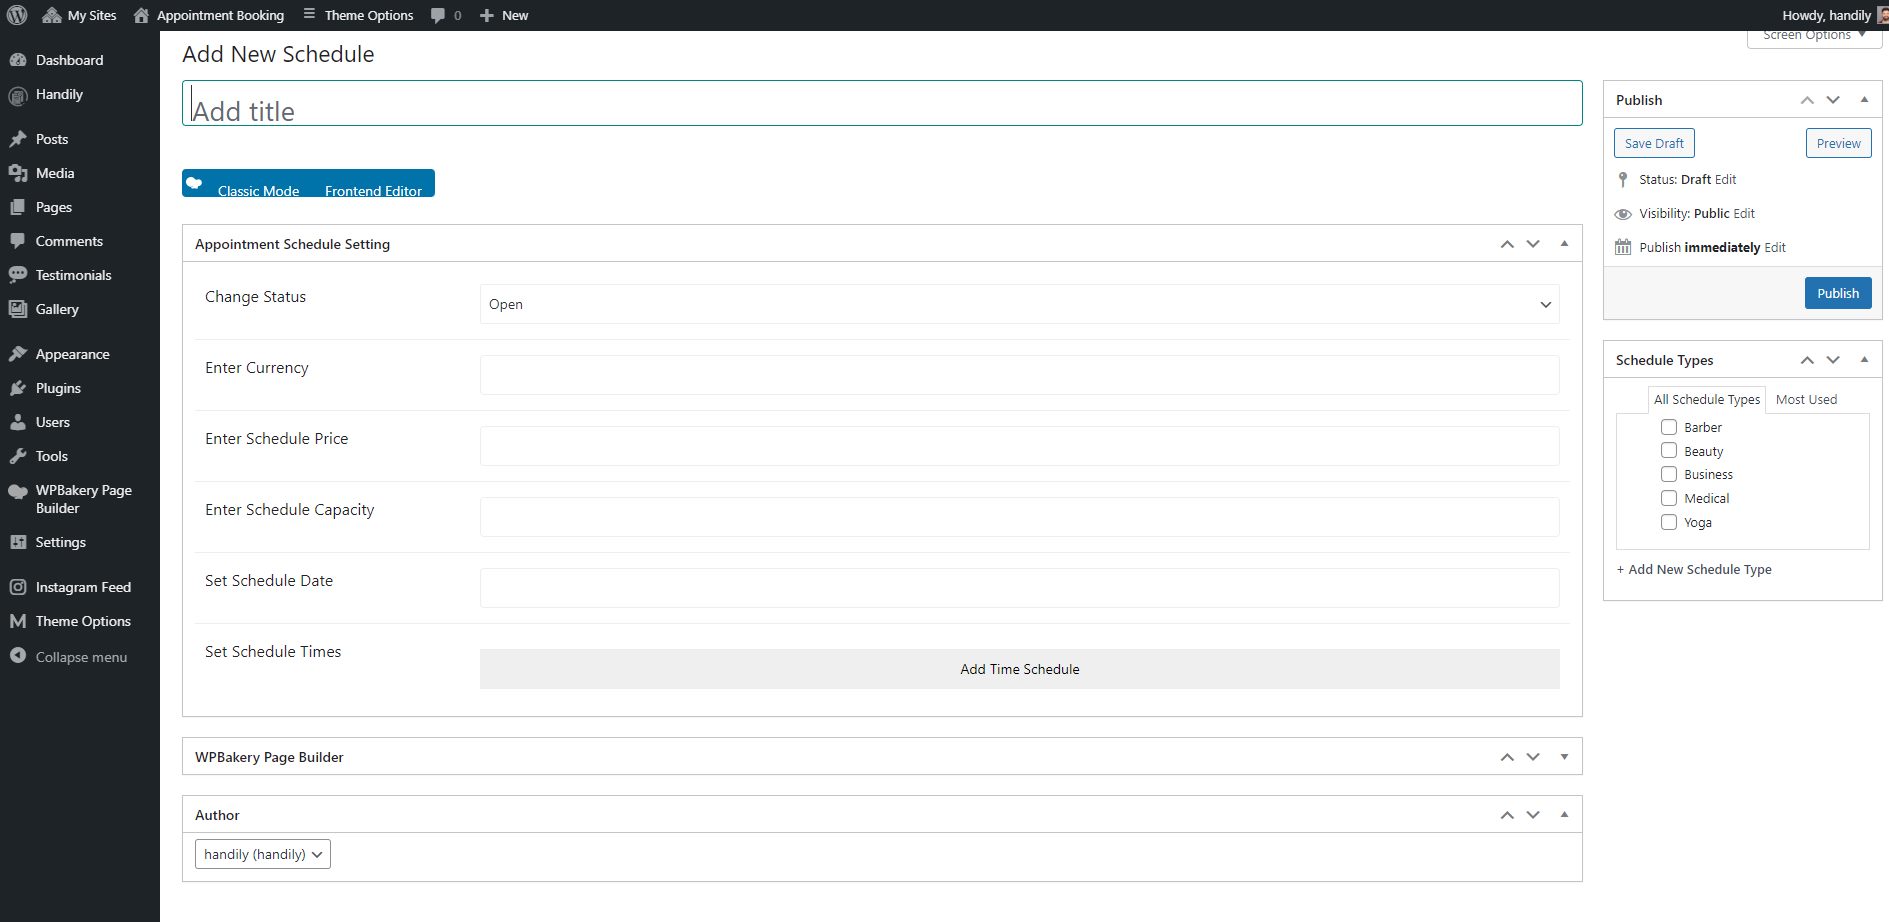
How to Add Appointment
Navigate to Dashboard >> Handily >> Appointment. Appointment section contains sub-menus that includes setting that are self explanatory.

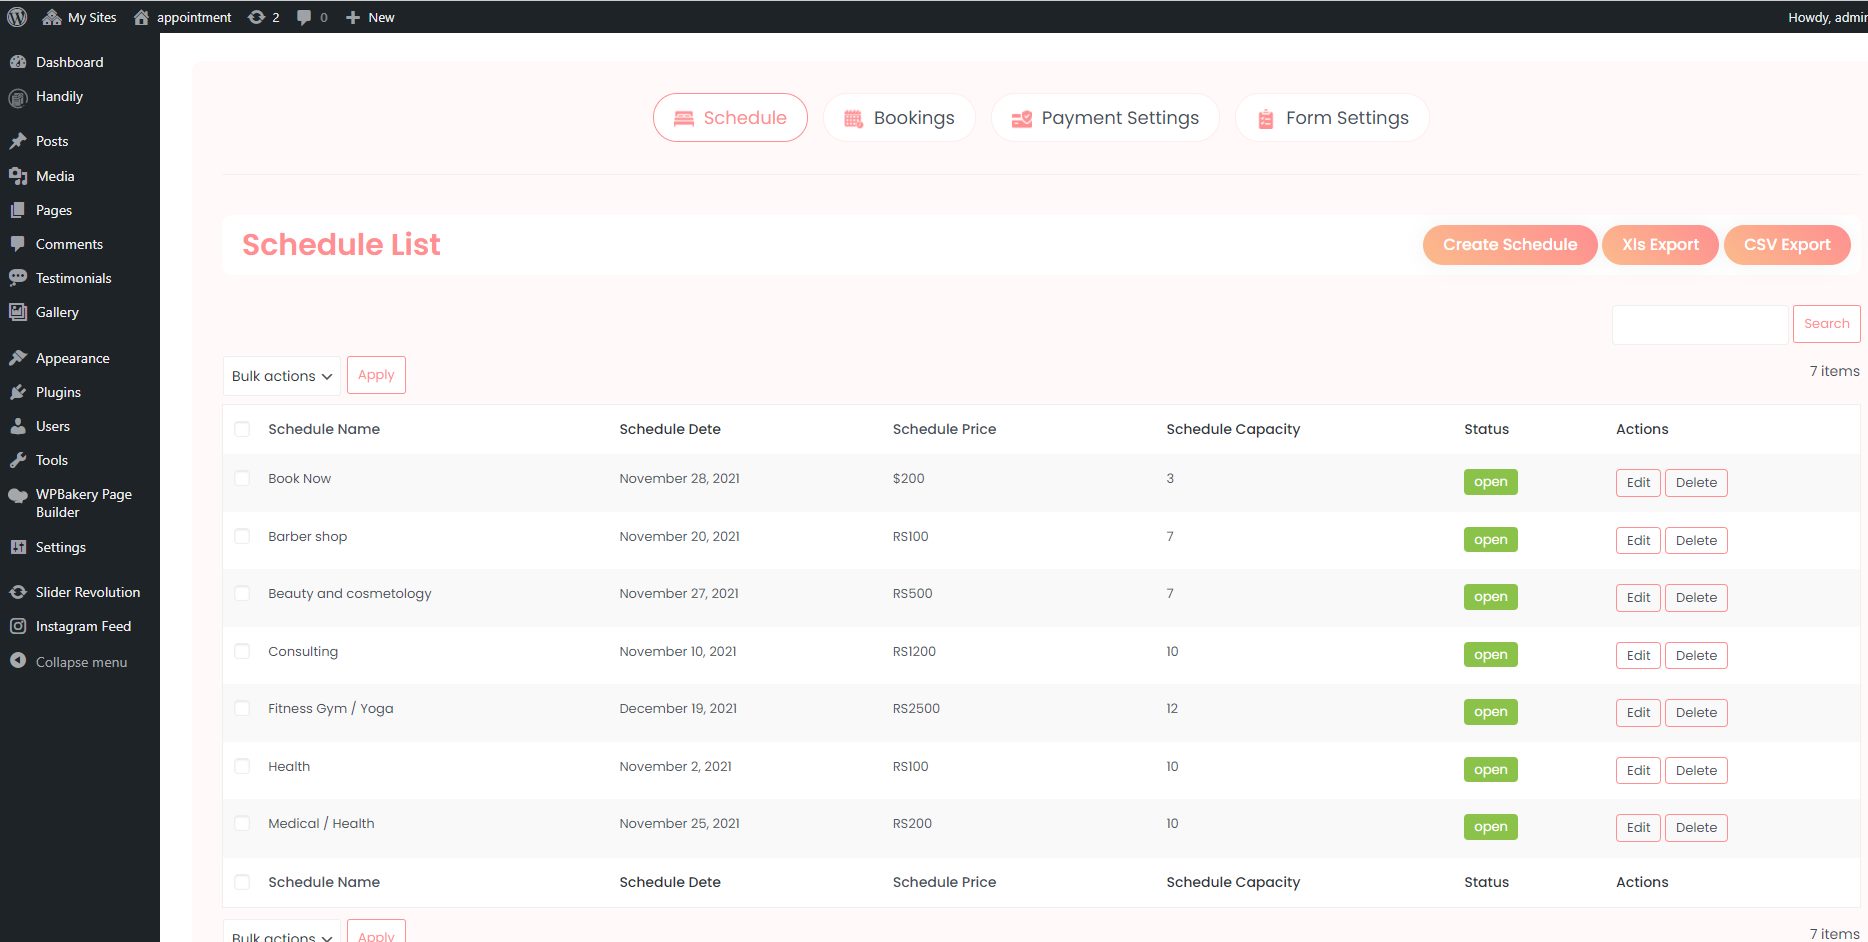
How to use Schedule option
With this setting, user can create, view or export the appointment schedule in CSV or XLS format.
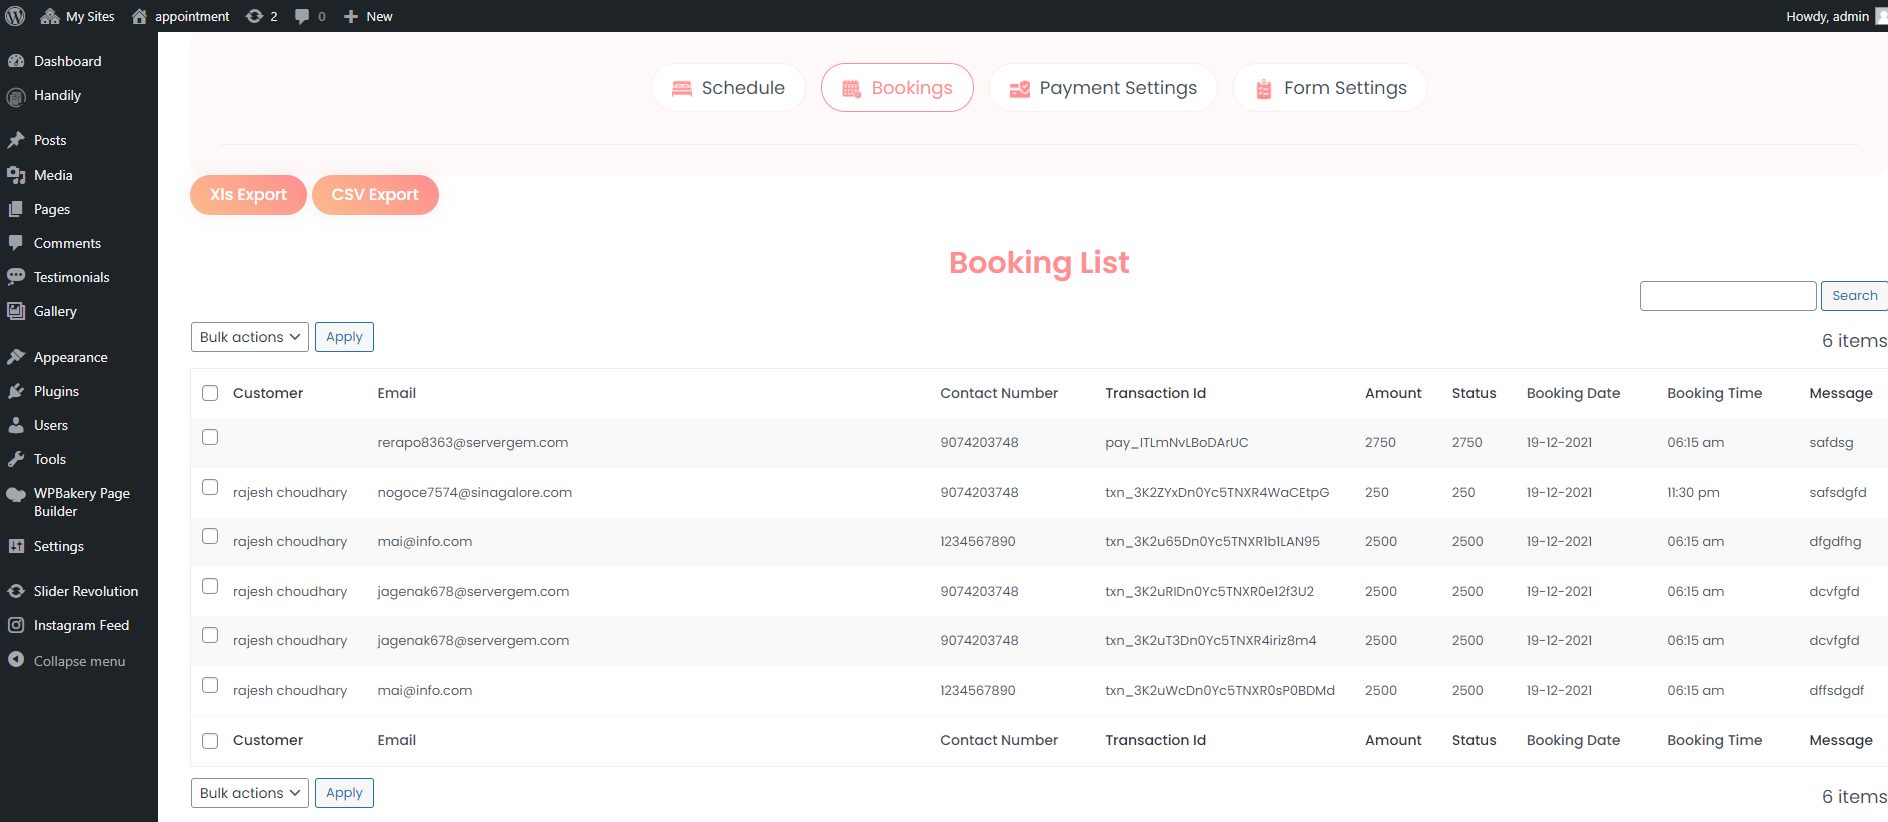
How to use Booking option
With this setting, user can view the appointment booking details and export the booking list in CSV or XLS format.
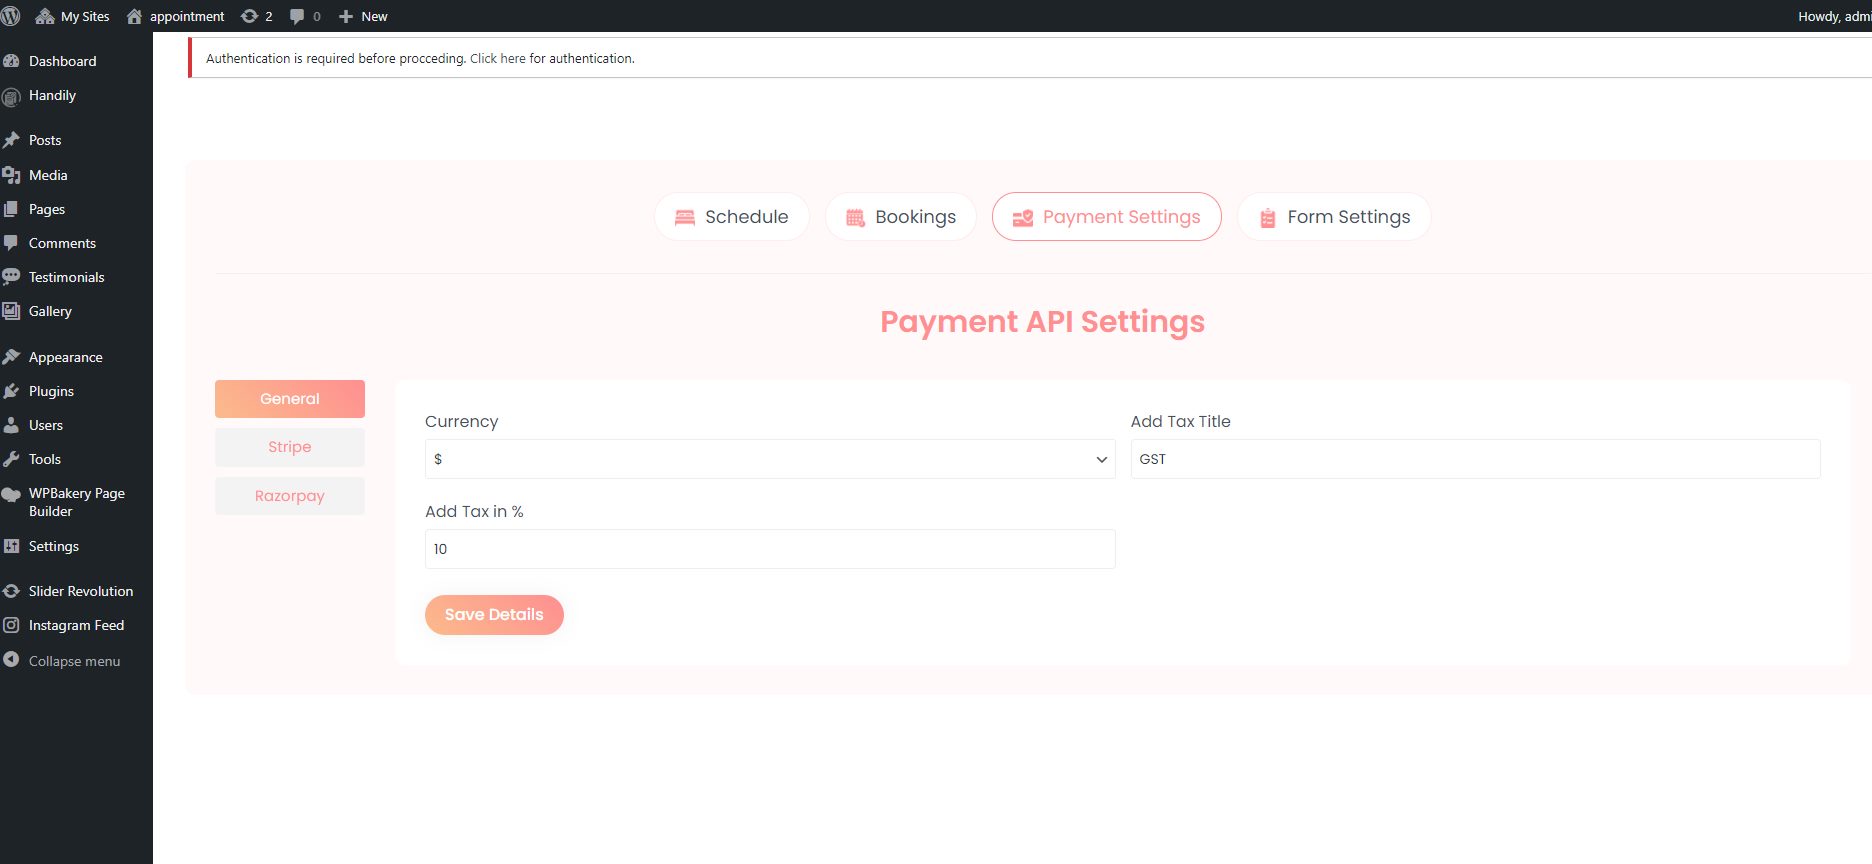
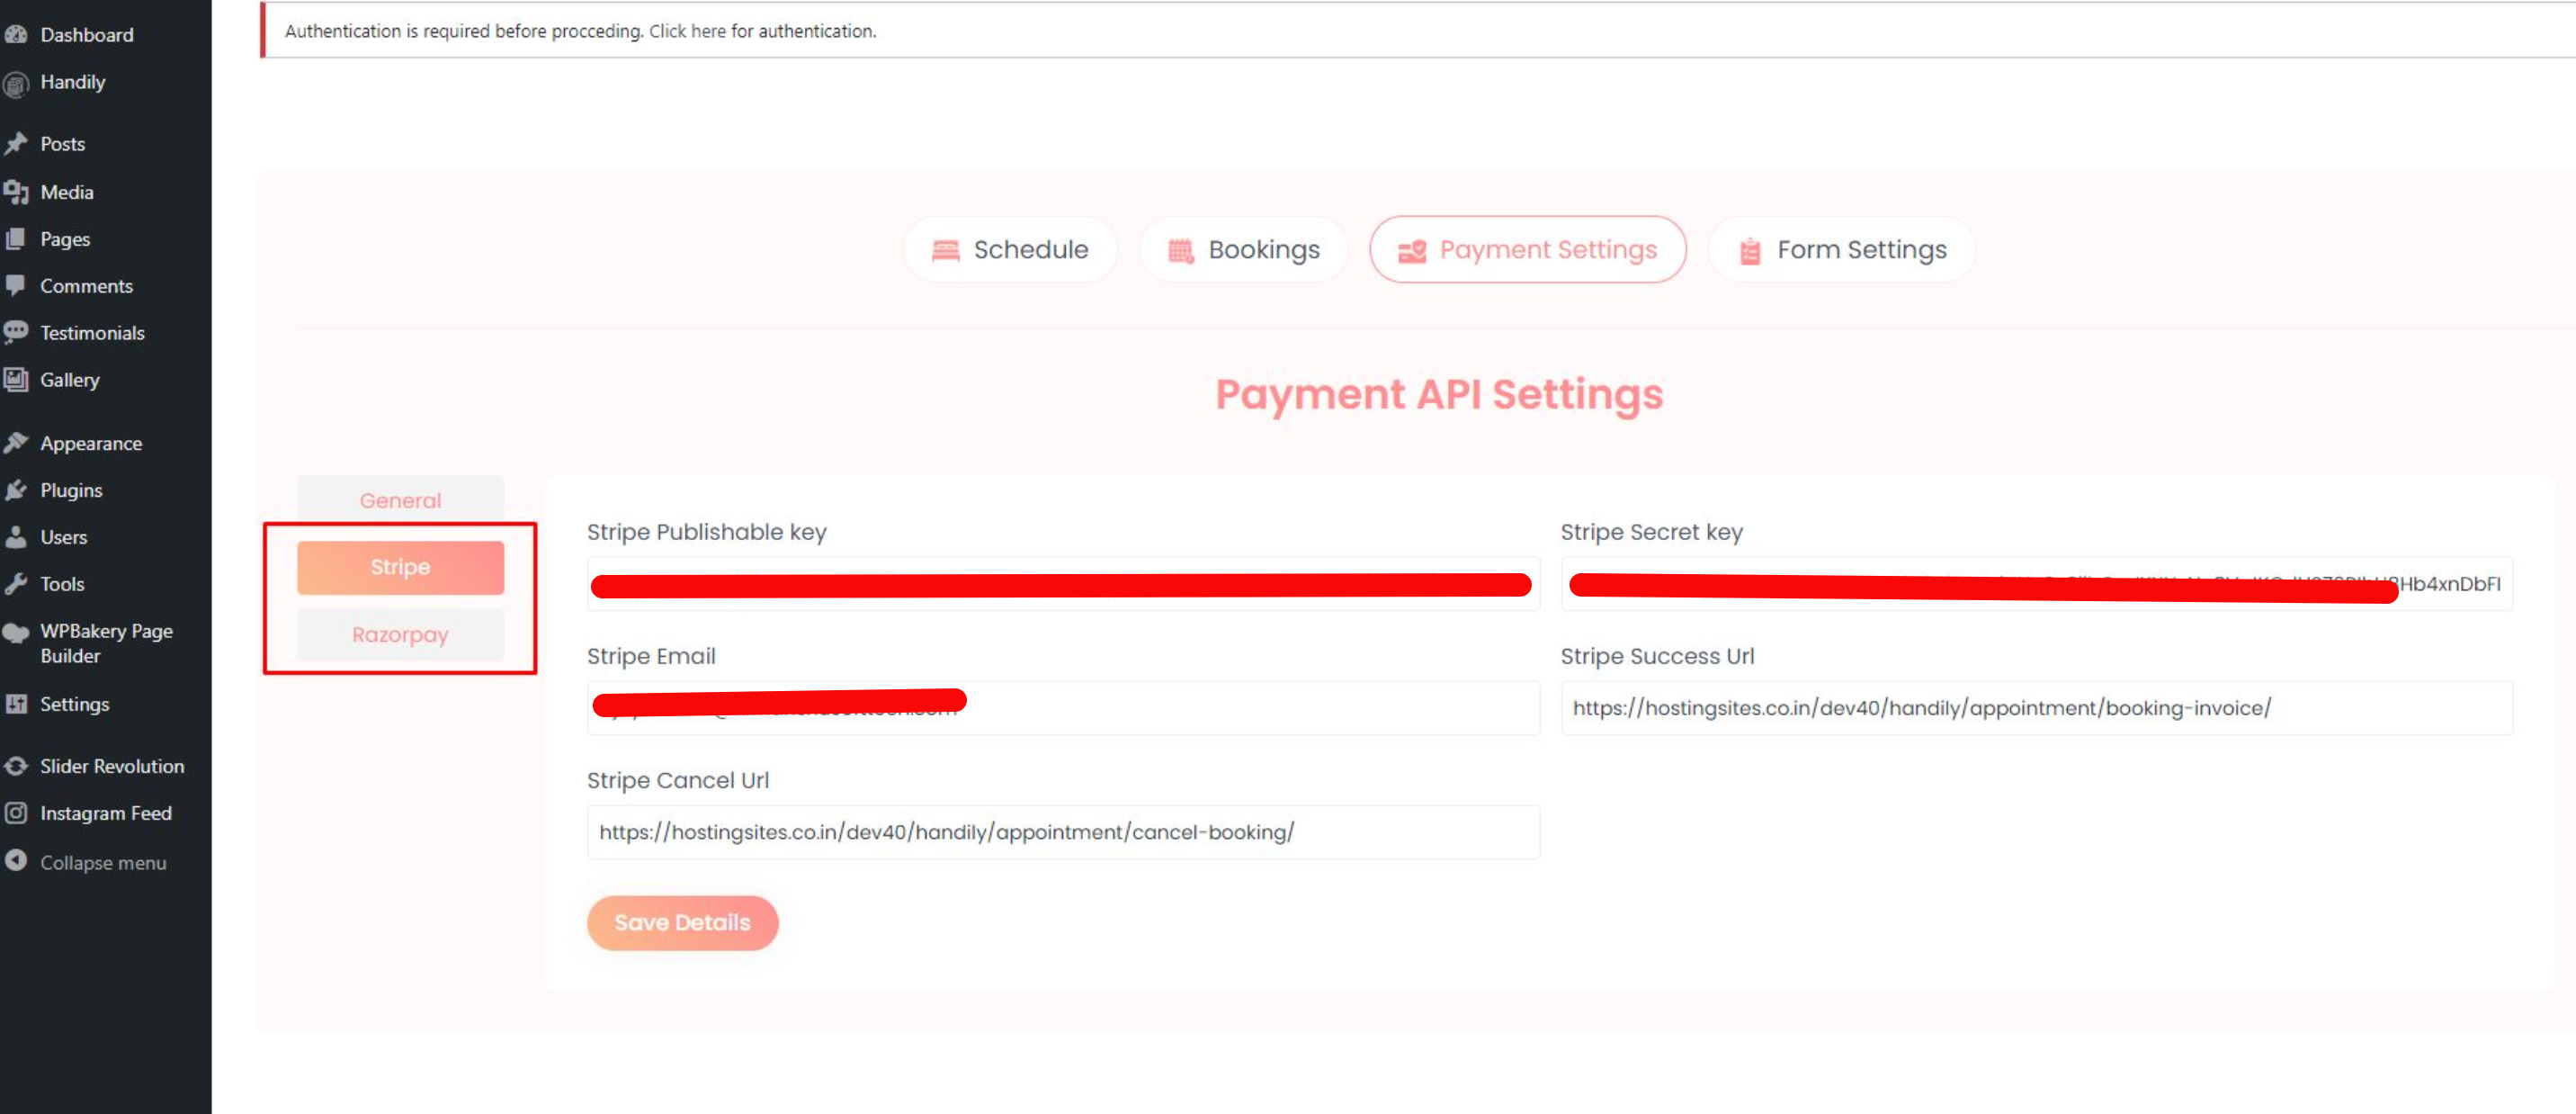
How to use Payment option
With this setting user can add the payment details. We have provided two payment metods Stripe and RazorPay. Along with this you can also include the tax that you want. .
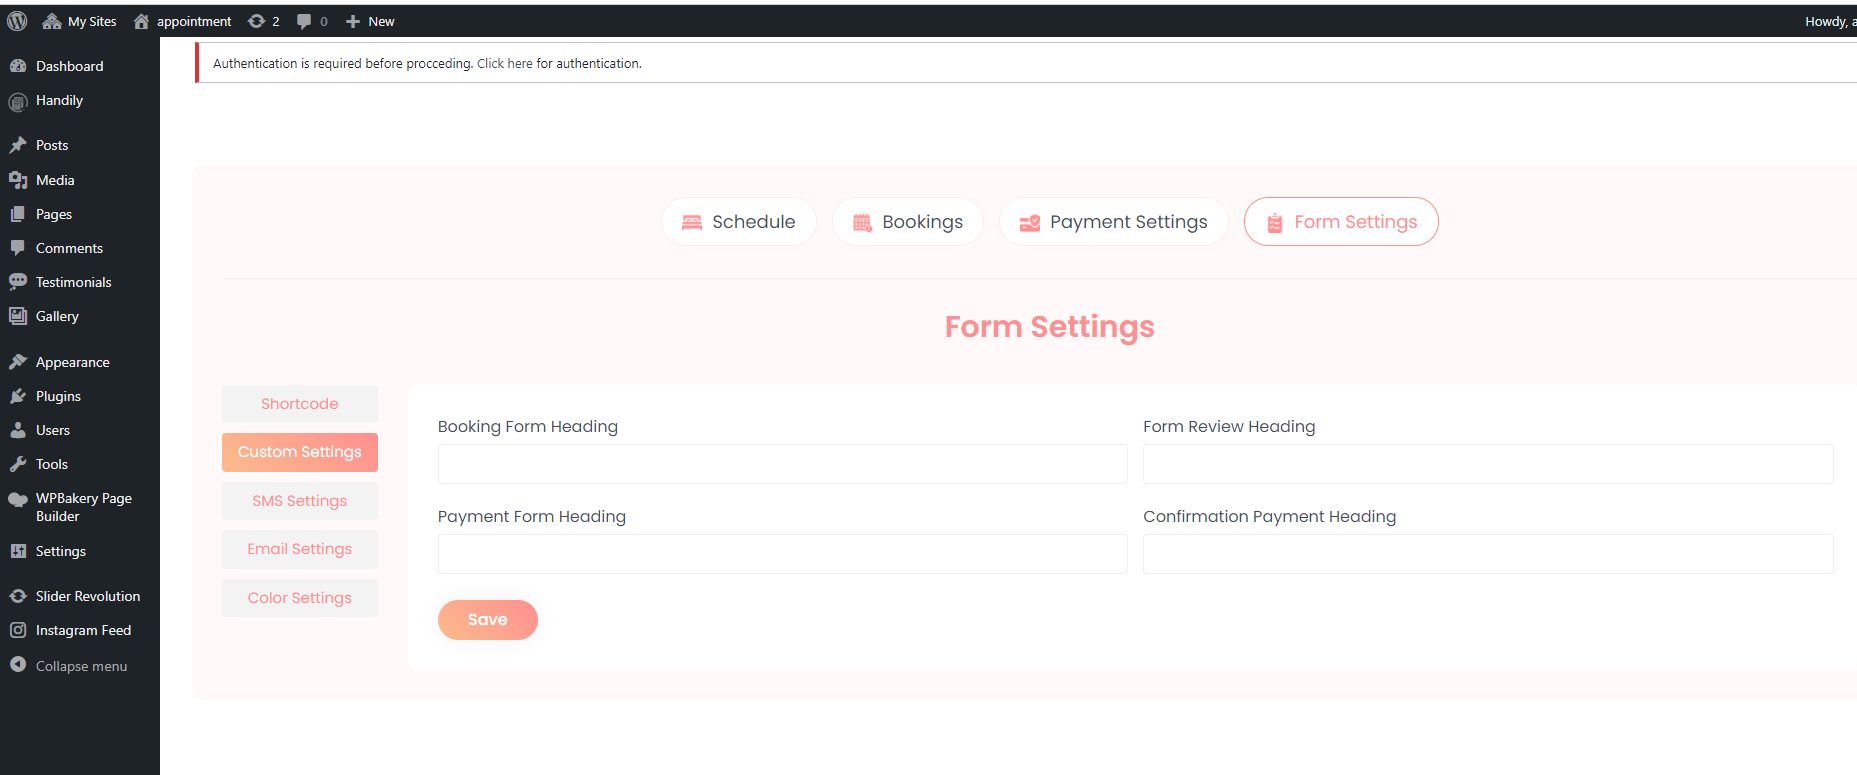
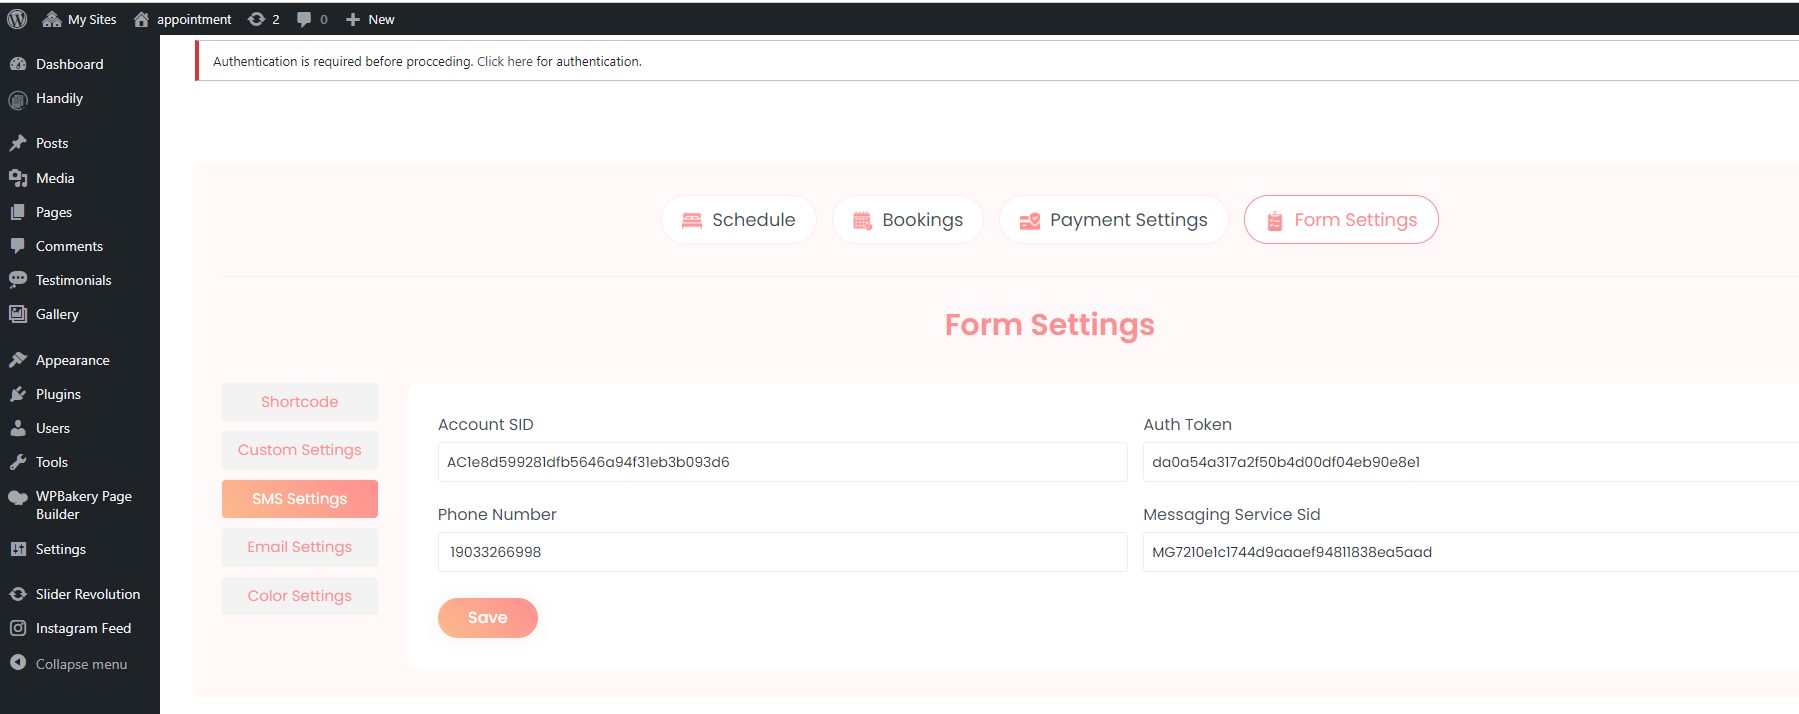
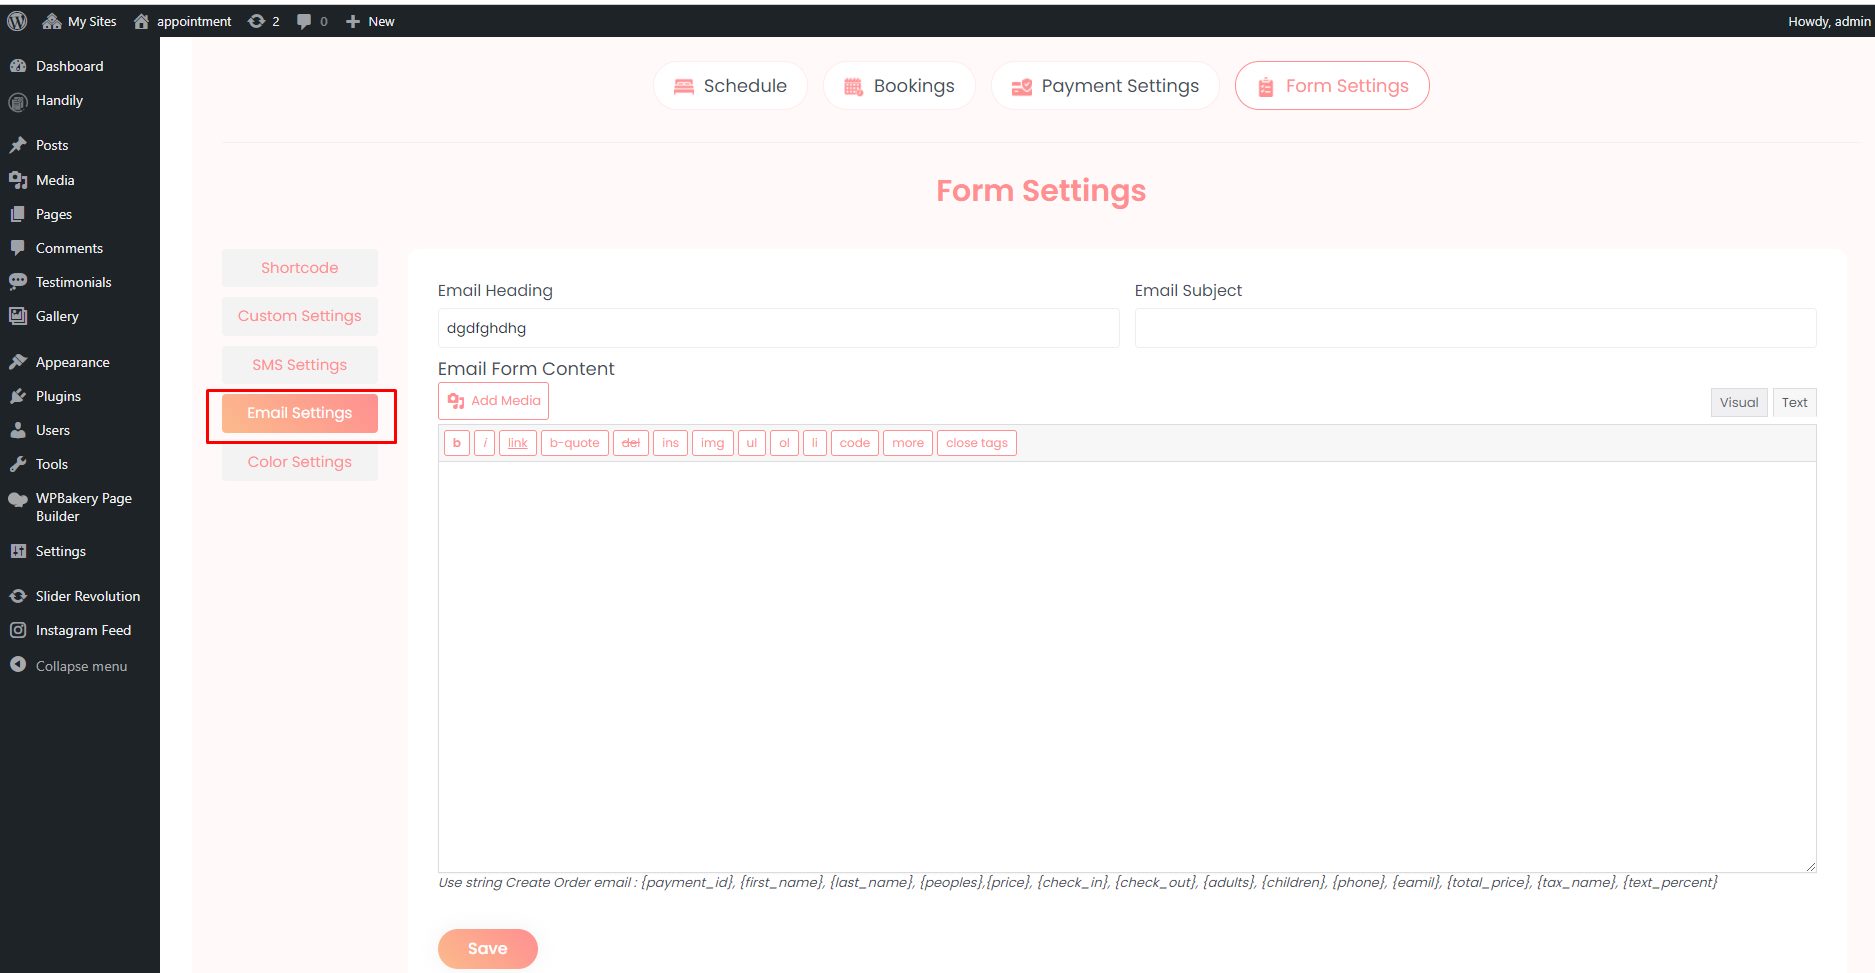
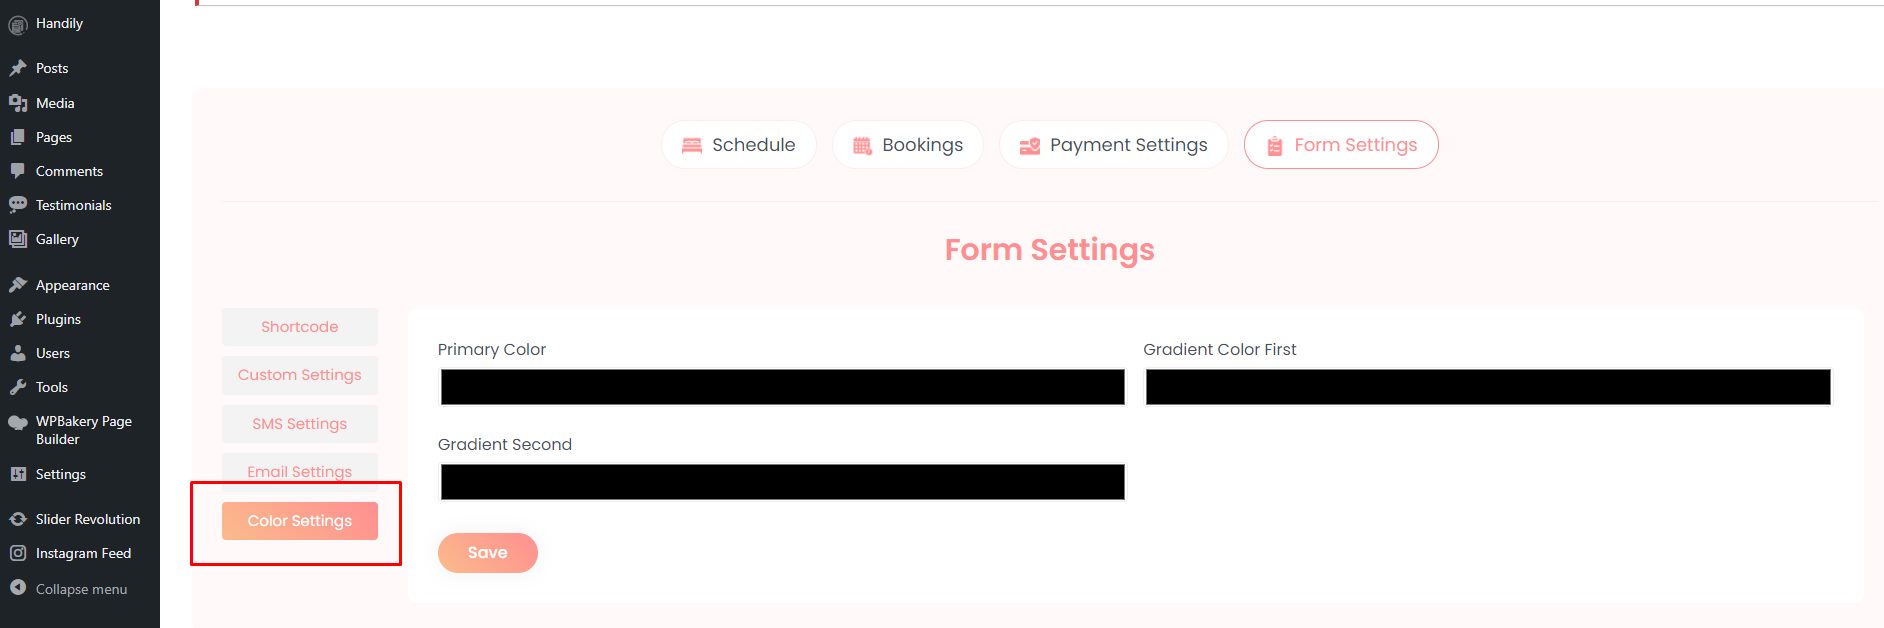
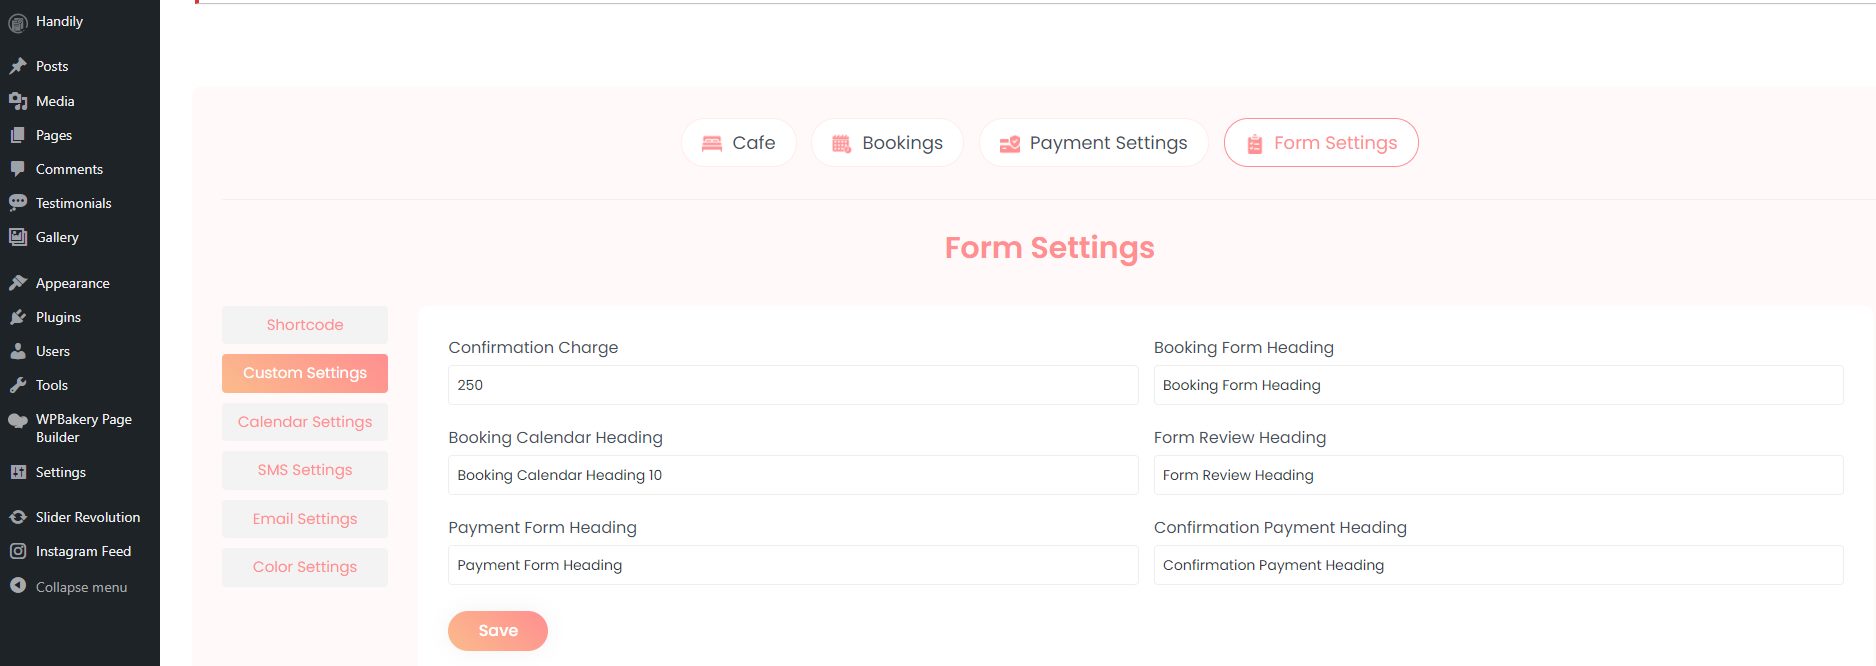
How to use Form Setting option
With this setting user can customise the form setting via shortcode and customise the label of the form via custom setting, setup settings for SMS, customize the content of Email and color of the form.
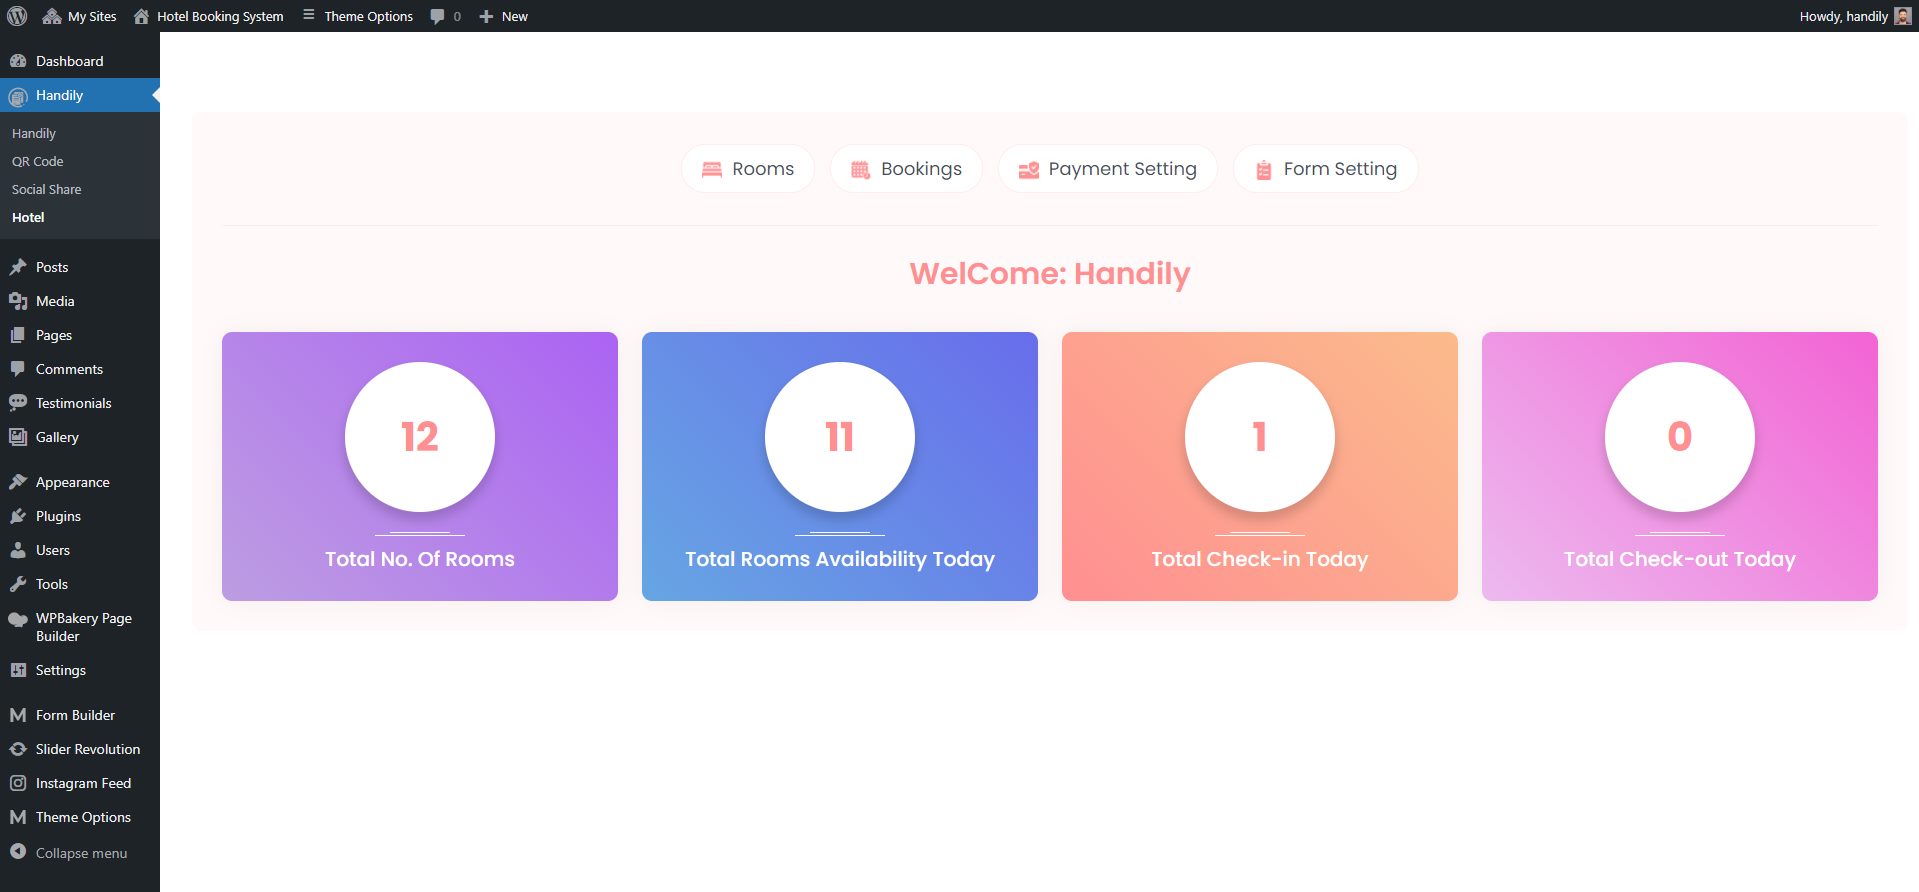
How to Use Hotel Booking
After selecting the Hotel Booking Service, you will get the QR code, Social Share, and Hotel Settings.
How to add QR Code
Navigate to Dashboard >> Handily >> QR Code. With this you can add the QR code.
How to use Social Share
Navigate to Dashboard >> Handily >> Social Share. With this setting user can share it via social network by selecting the platform.
How to Use Hotel
Navigate to Dashboard >> Handily >> Hotel. Appointment section contains sub-menus that includes setting that are self explanatory.
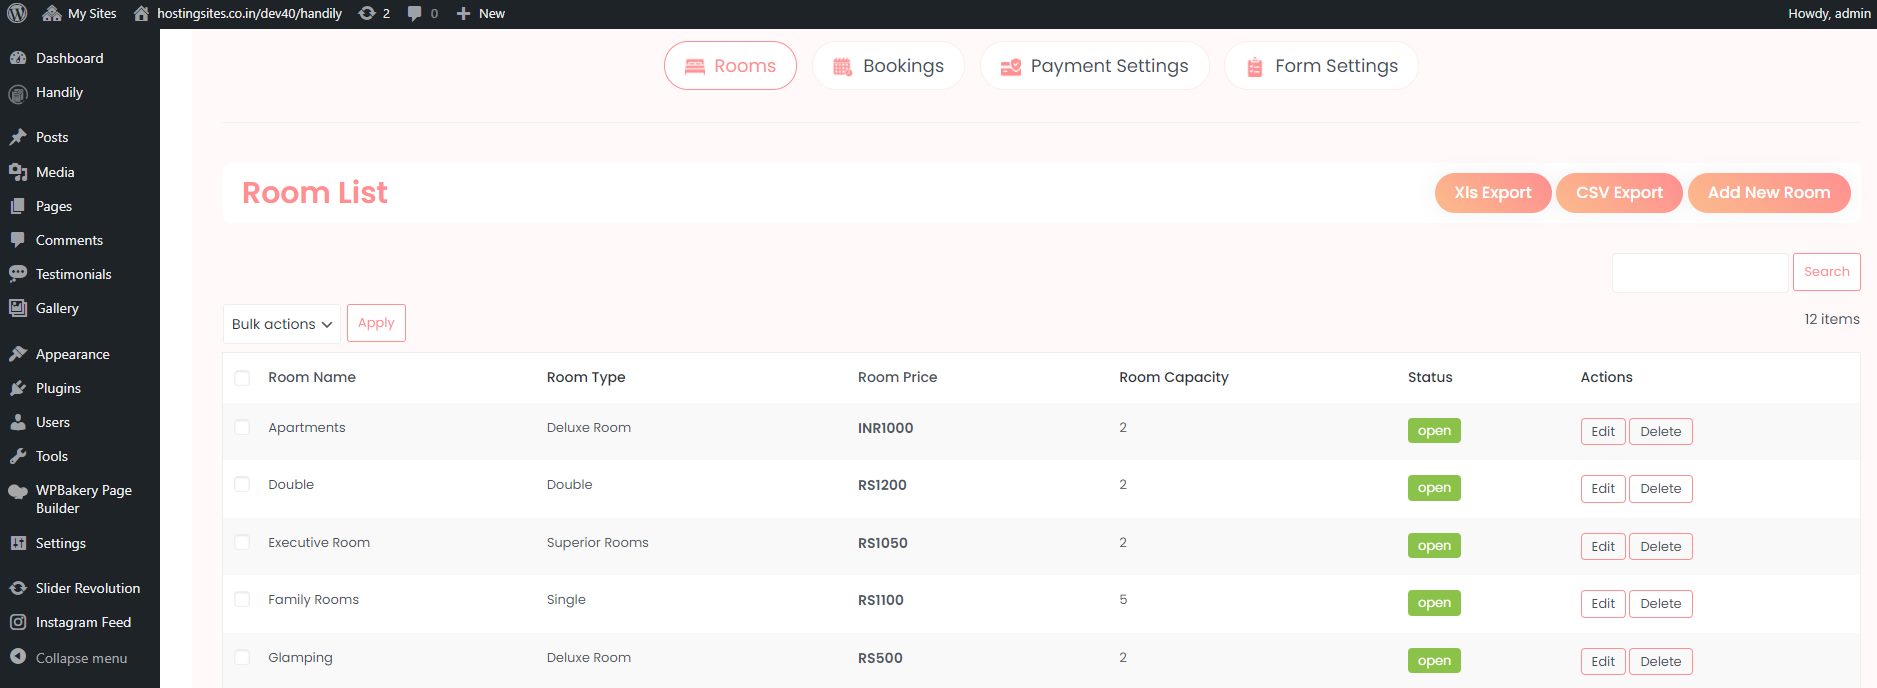
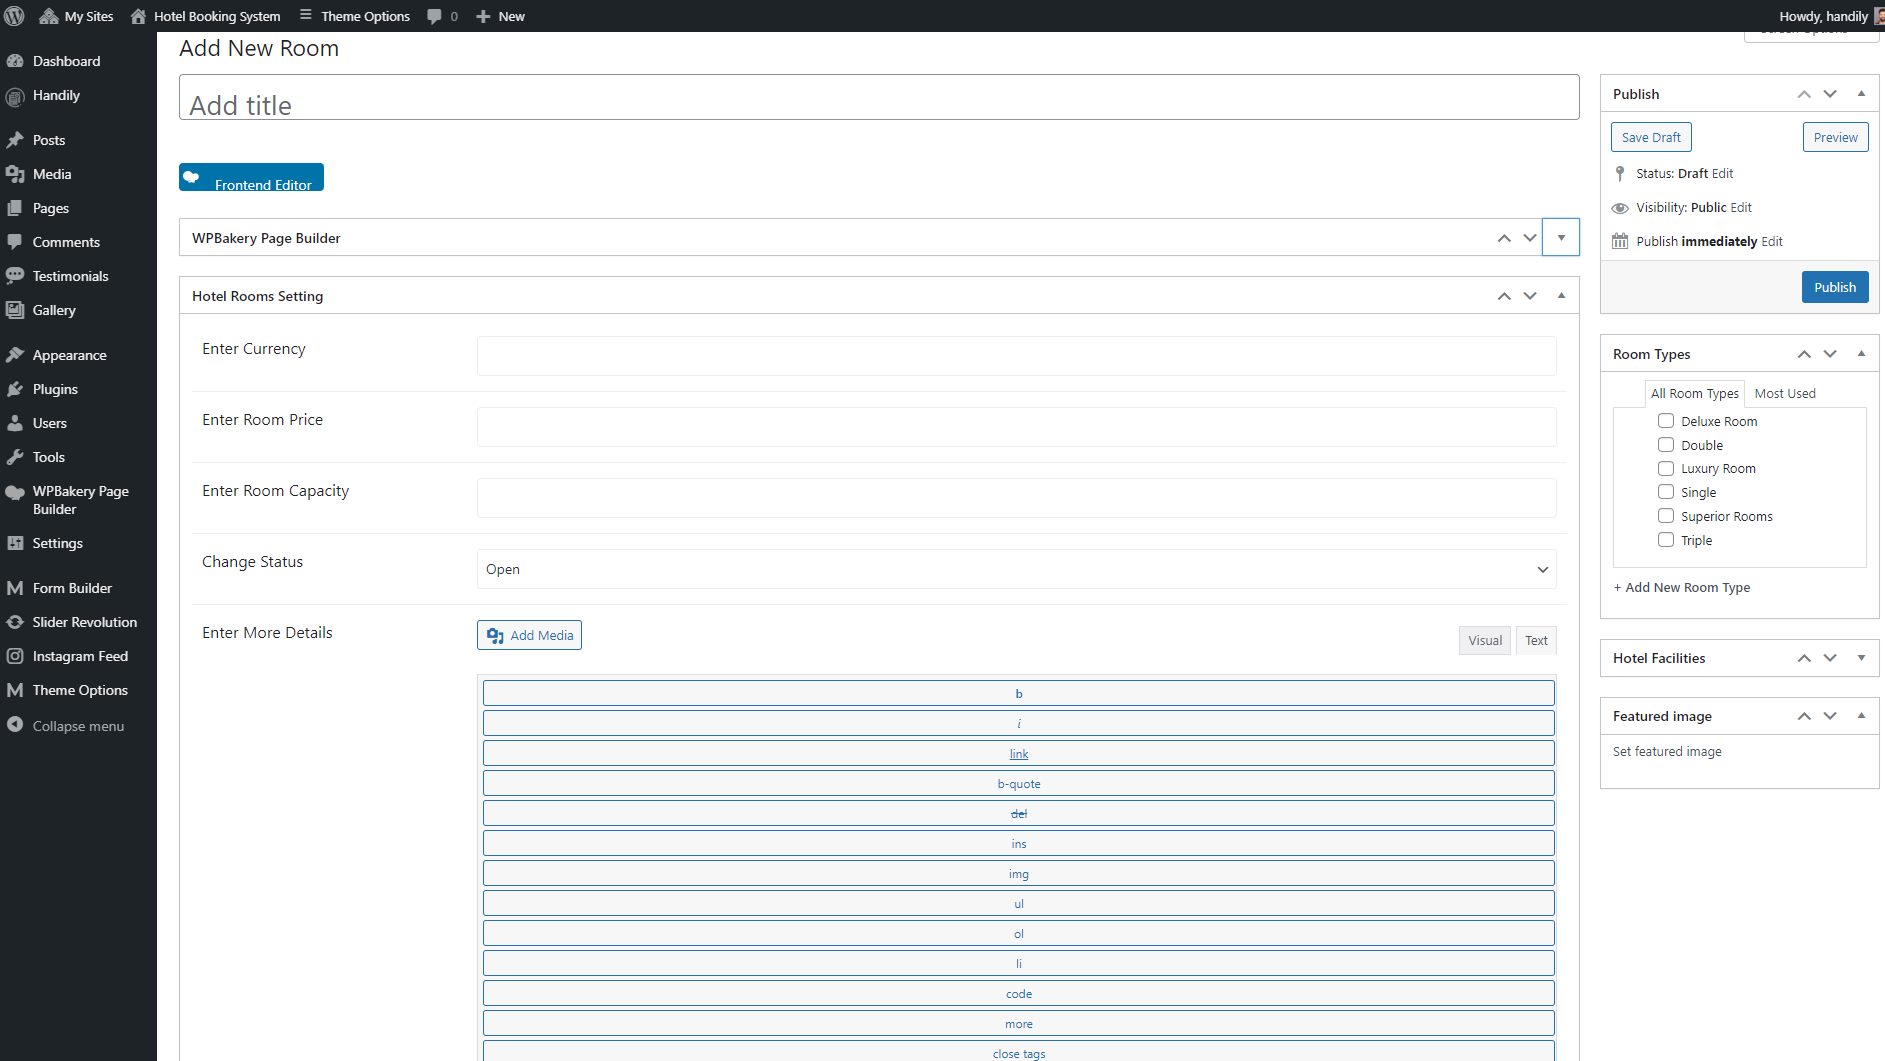
How to use Room option
With this setting user can create, view and export the rooms lists in XLS and CSV format.
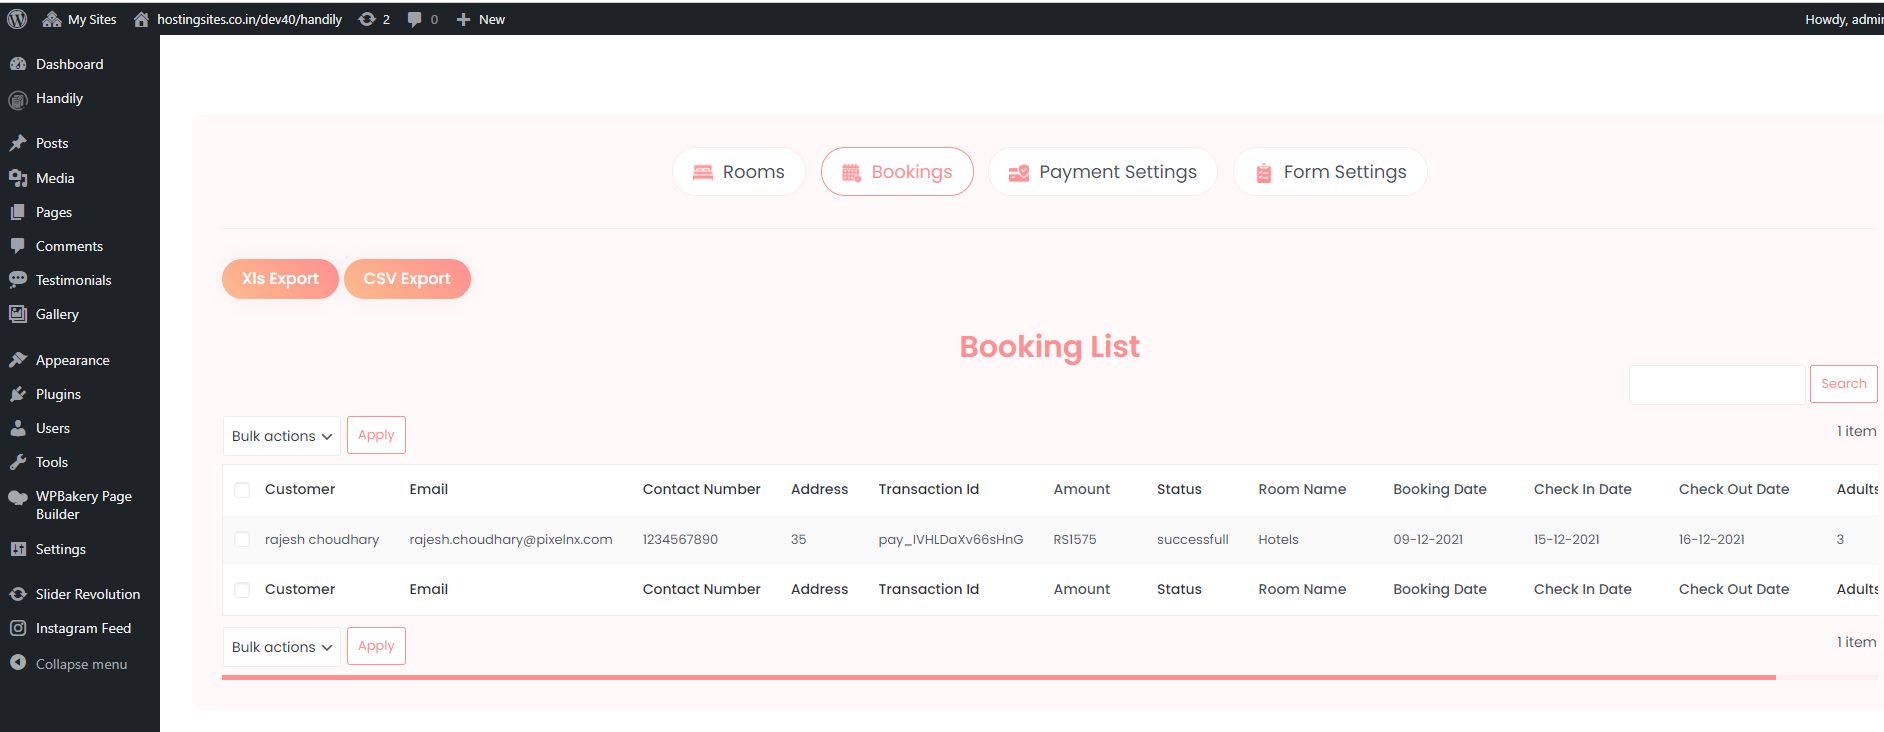
How to use Booking option
With this setting user can view the booking details and can also export the booking details.
How to use Payment option
With this setting user can add the payment details. We have provided two payment metods Stripe and RazorPay. Along with this you can also include the tax that you want. .
How to use Form Setting option
With this setting user can customise the form setting via shortcode and customise the label of the form via custom setting form via custom setting, setup settings for SMS, customize the content of Email and color of the form. You will get the settings accordingly.
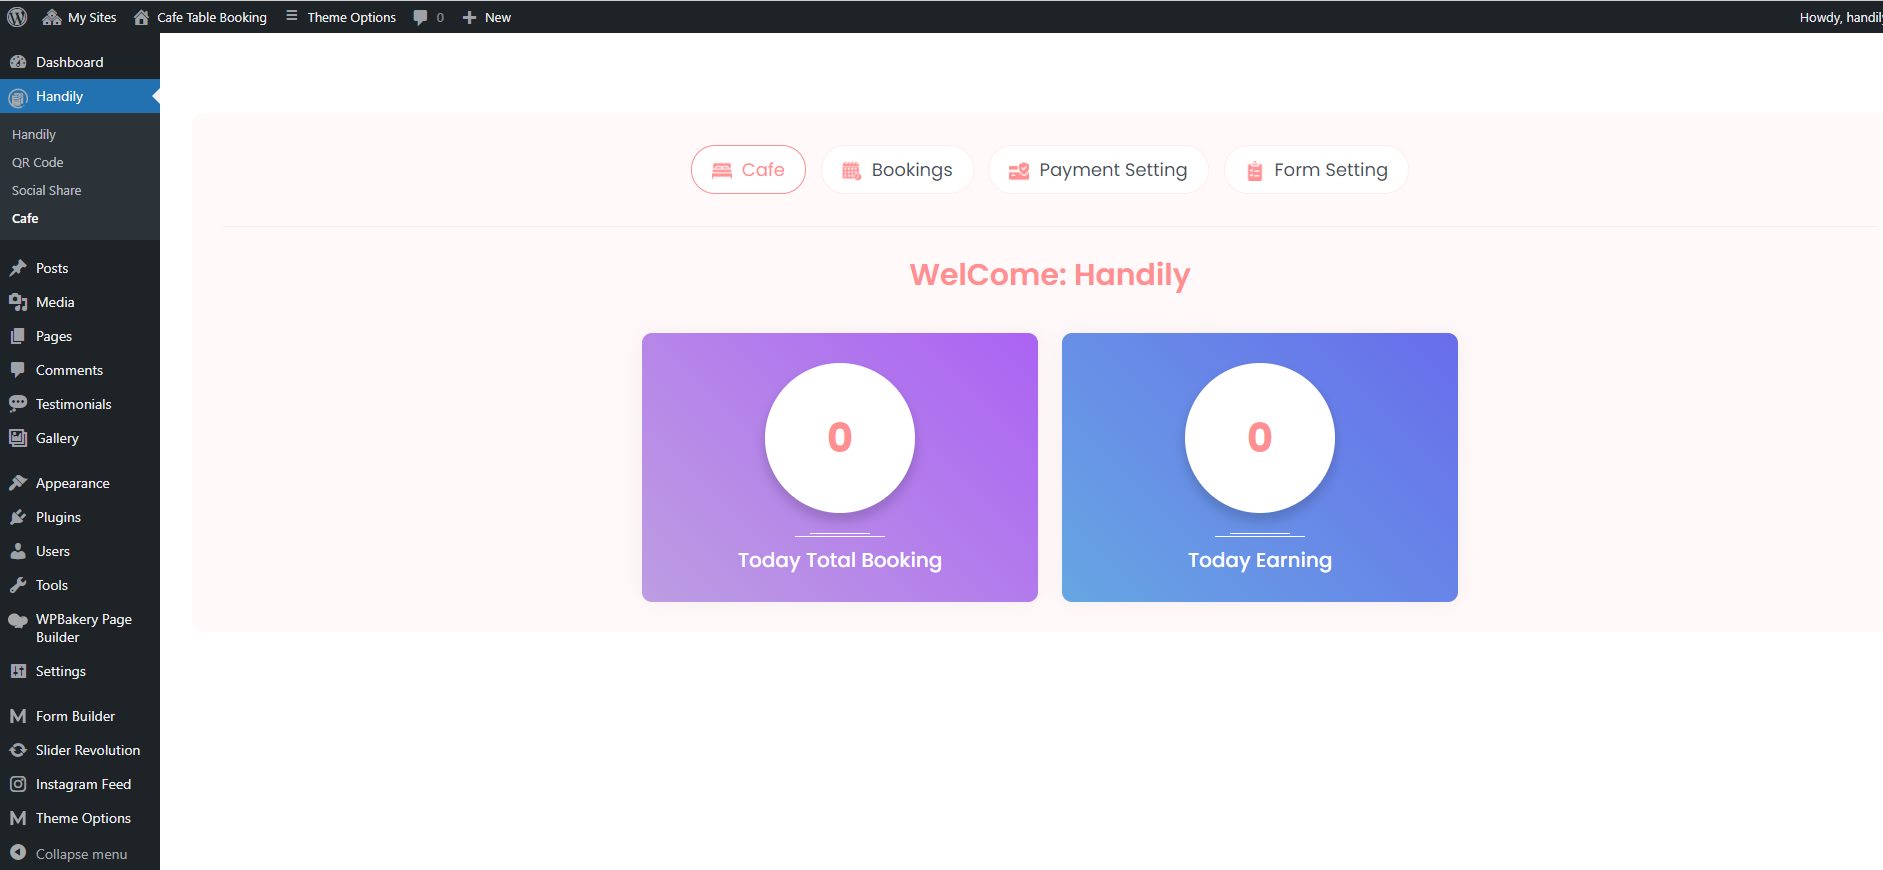
How To Use Cafe Table Booking
After selecting the Cafe Table Service you will get the QR Code, Social Share, and Cafe settings accordingly.
How to add QR Code
Navigate to Dashboard >> Handily >> QR Code. With this you can add the QR code.
How to use Social Share
Navigate to Dashboard >> Handily >> Social Share. With this setting user can share it via social network by selecting the platform.
How to Use Cafe
Navigate to Dashboard >> Handily >> Cafe. Appointment section contains sub-menus that includes setting that are self explanatory.
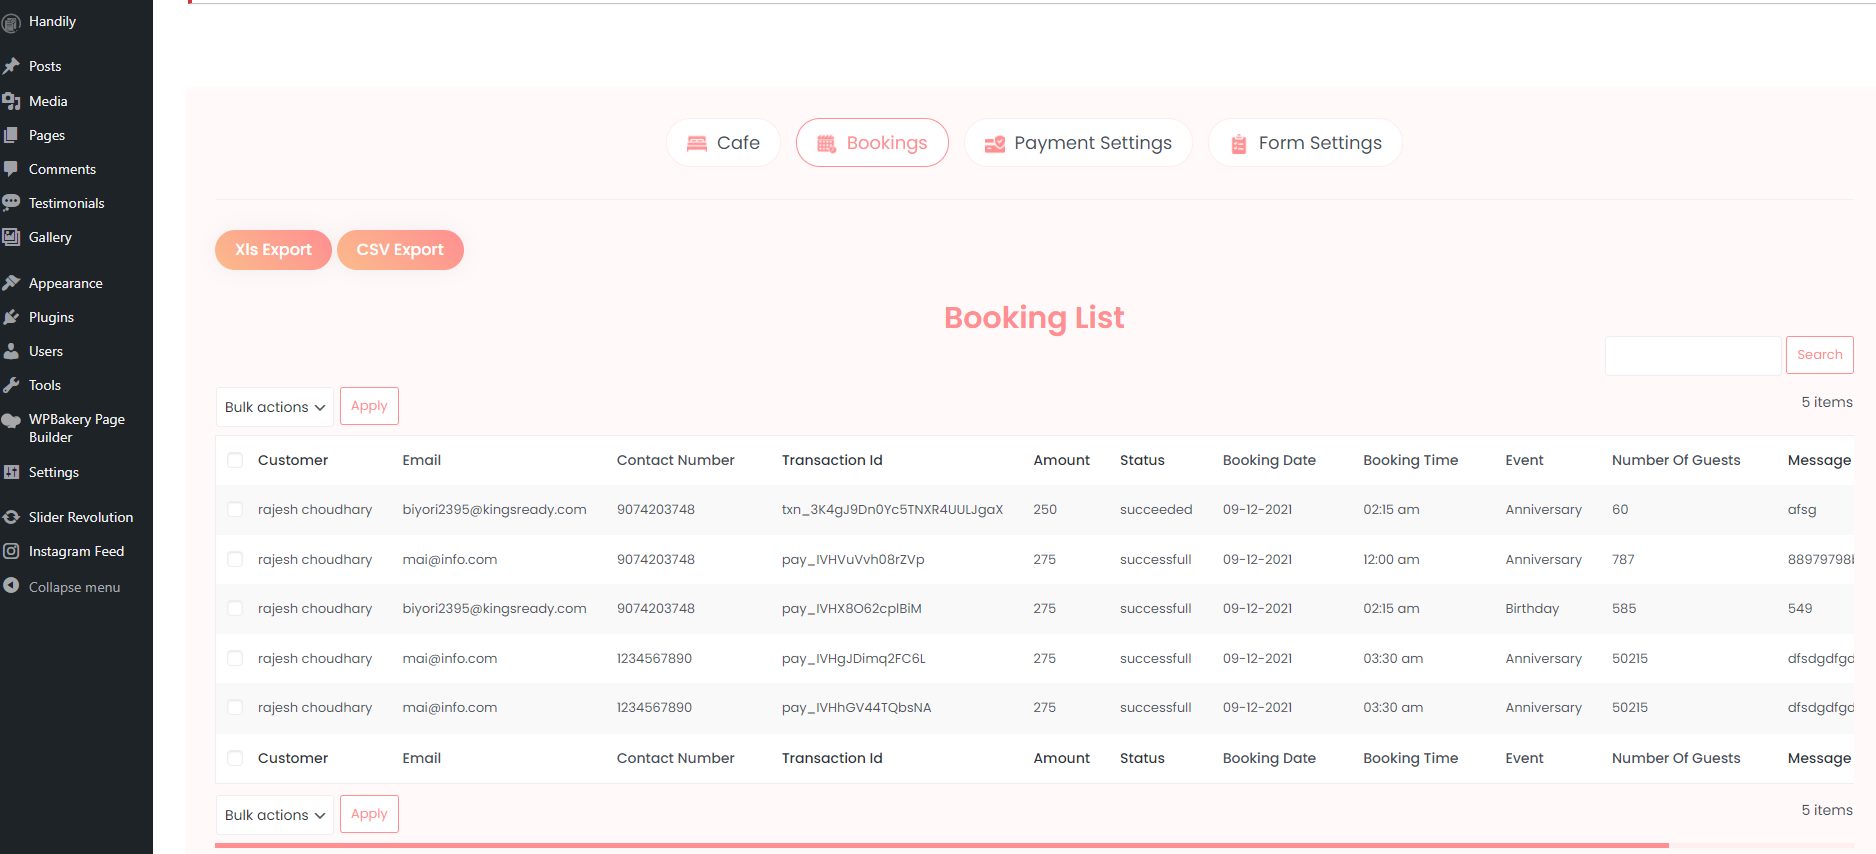
How to use Booking option
With this setting user can view the cafe table booking details and can also able to export it in either CSV or XLS format.
How to use Booking option
With this setting user can view the booking details and can also export the booking details.
How to use Payment option
With this setting user can add the payment details. We have provided two payment metods Stripe and RazorPay. Along with this you can also include the tax that you want. .
How to use Form Setting option
With this setting user can customise the form setting via shortcode, customise the label of the form via custom setting and disable any date through calendar setting. Along with that you can also add the SMS details, customize the email content and manage the colors of form.
Help And Support
In order to receive a technical support assistance, you need to have a valid purchase code. To get the code, please navigate to your Codecanyon "Downloads" page and click on the plugin download link.
After getting the Purchase code, please follow the steps mentioned on the link click Here to get your product verified. And then share your Purchase code and token ID with the support team.
If you have any questions that are beyond the reach of this help file, feel free to contact us. We will respond as soon as possible (within 24 – 48 hours, usually faster). We are open from 10:00am to 07:00pm (IST), from Monday to Friday.
NOTE: As authors of this plugin we do provide support only for the plugin-related features.
Outro
Thank you for your purchase. If you have any questions that are beyond the scope of this help file, please contact us through https://support.motothemes.net/
Once again, thank you so much for purchasing this plugin. As I said at the beginning, I'd be glad to help you if you have any questions relating to this plugin. No guarantees, but I'll do my best to assist. If you have a more general question relating to the plugin, you might consider visiting the forums and asking your question in the "Item Discussion" section.